
Taylor Cooking Thermometer Instructions: A Comprehensive Guide
Taylor, founded in 1851, prioritizes accuracy. This guide details using Taylor thermometers – from basic models to wireless options – ensuring precise temperature readings for perfect cooking results.
Taylor has a rich history, originating in 1851 with George Taylor’s commitment to “accuracy first.” This dedication has propelled the brand to become a trusted name in measurement tools, extending beyond kitchen applications to include instruments used in demanding fields like aviation. Taylor’s legacy encompasses a diverse range of products, all built upon a foundation of precision and reliability.
Taylor cooking thermometers are designed to take the guesswork out of food preparation, ensuring meals are cooked to safe and optimal temperatures. From simple instant-read models to sophisticated wireless systems like the Taylor 1730, there’s a Taylor thermometer to suit every cook’s needs and preferences. Understanding the specific features and functionalities of your Taylor thermometer is key to achieving consistently excellent results; This guide will provide comprehensive instructions, troubleshooting tips, and care advice to help you maximize the performance and longevity of your Taylor cooking thermometer.
Understanding Different Taylor Thermometer Models
Taylor offers a variety of cooking thermometers, each designed for specific applications. Basic digital cooking thermometers provide straightforward temperature readings, ideal for general cooking tasks. Instant-read thermometers deliver rapid results, perfect for quick checks during cooking. The Taylor 1730 Wireless Indoor/Outdoor Thermometer & Clock, however, represents a more advanced option.
The Taylor 1730 utilizes a remote sensor to monitor temperatures from a distance, offering convenience and flexibility. Additional sensors (item number 91465-SF) can be added for multi-zone monitoring. Understanding the capabilities of each model is crucial. For instance, the 1730 can be reset to factory settings with the RESET button if malfunctions occur, requiring a re-entry of user settings. Choosing the right Taylor thermometer depends on your cooking style and desired level of precision and convenience. Proper use, as detailed in the manual, ensures optimal performance.
Key Features of Taylor Cooking Thermometers
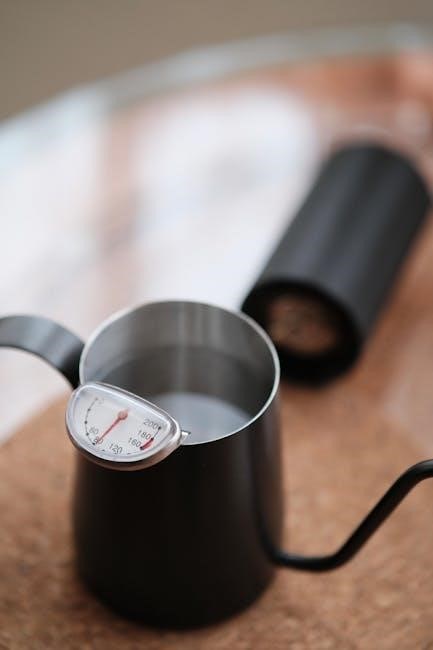
Taylor cooking thermometers are renowned for their accuracy, a legacy stemming from the company’s 1851 founding and George Taylor’s commitment to “accuracy first.” A key feature across models is the stainless steel probe, designed for safe food insertion – at least 1 inch is recommended for optimal readings. However, avoiding contact with bone, fat, or gristle is vital, as these elements yield inaccurate temperatures.
Wireless models, like the Taylor 1730, boast remote monitoring capabilities, enhancing convenience. All Taylor thermometers prioritize reliability, with features like reset buttons for factory restoration in case of malfunction. Low battery warnings alert users to timely replacements, ensuring continuous operation. Furthermore, the availability of additional sensors for certain models allows for versatile temperature tracking. These features collectively contribute to a superior cooking experience, delivering consistent and dependable results.
Getting Started with Your Taylor Thermometer
Begin by inserting batteries correctly and powering the unit on using the ON/OFF button. Initial setup may require calibration for peak performance and accuracy.
Inserting Batteries Correctly
Ensuring proper battery installation is crucial for accurate operation of your Taylor thermometer. Before first use, or when replacing batteries, carefully locate the battery compartment – typically found on the back or within the handle of the device. Refer to the specific model’s diagram if needed.
Most Taylor thermometers require standard AAA or AA batteries. Always insert batteries with the correct polarity, matching the positive (+) and negative (-) markings inside the compartment. Incorrect insertion can damage the thermometer and void the warranty.
Use fresh, high-quality batteries for optimal performance. Avoid mixing old and new batteries, or different battery types. Securely close the battery compartment door after insertion, ensuring it clicks or locks into place. A loose battery door can interrupt the connection and cause inaccurate readings. If the display is dim or unresponsive, double-check the battery installation and consider replacing the batteries again.
Powering On and Off
Operating your Taylor thermometer is straightforward. To power on most models, simply press the designated “ON/OFF” button. The display should illuminate, indicating the unit is active and ready for use. Some models may automatically power on when the probe is extended.
To conserve battery life, always power off the thermometer when not in use. Press the “ON/OFF” button again to switch it off. Certain models feature an “auto-off” function, which will automatically turn the unit off after a period of inactivity – typically 5-10 minutes.
Be mindful of the auto-off feature to avoid unnecessary battery drain. If your thermometer doesn’t respond after pressing the power button, check the batteries first. A fully functional unit will display readings promptly upon activation. Avoid prolonged periods with the thermometer left on, even with the auto-off feature, to maximize battery longevity.
Initial Setup and Calibration
Before first use, ensure proper setup for accurate readings. Insert batteries correctly (refer to the ‘Inserting Batteries Correctly’ section). Upon powering on, some Taylor thermometers may require initial calibration. While many models are pre-calibrated at the factory, verifying accuracy is recommended.
To calibrate, if your model allows, use an ice bath (32°F/0°C). Submerge the probe in the ice water and compare the reading to 32°F. If there’s a discrepancy, consult your model’s specific instructions for calibration adjustments. Some thermometers have a ‘reset’ button to return to factory settings.
For the 1730 model, a reset button is available to restore original factory settings if malfunction occurs. After resetting, re-enter your desired settings. Proper initial setup and occasional calibration ensure your Taylor thermometer delivers consistently reliable temperature measurements.

Using Your Taylor Thermometer for Cooking
Achieve perfect results by inserting the probe at least 1 inch into the food, avoiding bone, fat, and gristle for accurate temperature readings during cooking.
Proper Probe Placement for Accurate Readings
Ensuring accuracy with your Taylor thermometer begins with correct probe placement. For optimal results, insert the stainless steel probe a minimum of one inch into the thickest part of the food. This depth guarantees the sensor is measuring the internal temperature, not influenced by external heat.
Crucially, avoid contact with bone, fat, or gristle. These components conduct heat differently than muscle tissue, leading to falsely high or inaccurate readings. Bone can radiate heat, while fat and gristle insulate, preventing the probe from reaching the true internal temperature.
When measuring thinner foods like steaks or chicken breasts, insert the probe horizontally from the side, ensuring the tip is centered within the thickest section. For larger items, like roasts, probe placement is vital for consistent results throughout the cooking process. Proper placement is key to safe and delicious meals!
Avoiding Bone, Fat, and Gristle Contact
Accurate temperature readings depend heavily on avoiding contact between the Taylor thermometer probe and bone, fat, or gristle. These substances significantly distort heat transfer, leading to unreliable results and potentially unsafe food.

Bone conducts heat rapidly, creating a localized hot spot that doesn’t reflect the overall internal temperature. Fat, conversely, insulates, slowing heat absorption and providing a lower reading than the actual internal temperature. Gristle, being dense and fibrous, also interferes with accurate heat conduction.
To mitigate these issues, carefully position the probe to ensure it’s embedded within the leanest part of the meat. Visualize the internal structure and steer clear of these problematic areas. A properly placed probe, away from bone, fat, and gristle, is essential for achieving perfectly cooked and safe-to-eat food every time. Prioritize probe placement for reliable results!
Temperature Measurement in Different Foods (Meat, Poultry, Fish)

Achieving food safety and optimal flavor requires understanding temperature variations across different protein types. Meat benefits from precise internal temperature checks, with recommendations varying by cut and desired doneness – typically 145°F (63°C) for medium-rare beef and pork.
Poultry demands higher temperatures to eliminate harmful bacteria; a minimum of 165°F (74°C) is crucial for both dark and white meat. Insert the Taylor thermometer into the thickest part, avoiding the bone. Fish is more delicate; aim for 145°F (63°C) or until the flesh flakes easily with a fork.
Remember that carryover cooking will continue to raise the temperature slightly after removal from the heat source. Utilize your Taylor thermometer consistently throughout the cooking process for consistently perfect results and peace of mind.

Specific Taylor Thermometer Model Instructions
Taylor offers diverse models, including the 1730 wireless thermometer and basic digital options. Each requires specific setup and usage for optimal performance and accurate readings.
Taylor 1730 Wireless Indoor/Outdoor Thermometer & Clock
The Taylor 1730 is a versatile device monitoring indoor or outdoor temperatures from a central location. Setup involves installing the remote sensor (item number 91465-SF, additional sensors available directly from Taylor) and ensuring a stable connection. For optimal performance, follow the operating instructions carefully.
If malfunction occurs, the unit can be reset to factory settings by pressing the RESET button once. This will erase current settings, requiring re-entry according to the manual. Battery information is crucial; low battery warnings indicate the need for replacement to maintain accuracy.
While primarily designed for ambient temperature, understanding its functionality aids in appreciating Taylor’s commitment to accuracy across all product lines. Remember to consult the full manual for detailed instructions and troubleshooting specific to the 1730 model.
Taylor Digital Cooking Thermometer ⸺ Basic Models
Taylor’s basic digital cooking thermometers prioritize simplicity and reliable temperature readings. To begin, press the ON/OFF button to activate the unit. For best results, insert the stainless steel probe at least one inch into the food you are testing – ensuring accurate measurement is paramount.
Crucially, avoid contact between the probe and bone, fat, or gristle. These components provide inaccurate readings due to their differing thermal properties. Taylor emphasizes accuracy first, and proper probe placement is key to achieving this.
Warning: Never leave the thermometer inside the oven during cooking. Do not touch the hot stem with bare hands. These basic models offer a straightforward approach to food safety and perfectly cooked meals, embodying Taylor’s long-standing legacy of precision.
Taylor Instant-Read Thermometers, Usage Tips
Taylor instant-read thermometers deliver rapid temperature assessments, crucial for achieving optimal cooking results. Insert the probe tip into the thickest part of the food, avoiding contact with bone, fat, or gristle for accurate readings. These areas yield misleading temperatures, compromising food safety and quality.
Hold the thermometer in place for a few seconds until the display stabilizes – this ensures a precise measurement. Remember, Taylor prioritizes accuracy, and patience is key. These thermometers are designed for quick checks, not continuous monitoring within a cooking environment.
Important: Do not leave the thermometer in the oven or on a hot surface. Clean the probe thoroughly after each use to maintain hygiene and prolong the thermometer’s lifespan. Embrace Taylor’s commitment to precision with these simple usage guidelines.
Troubleshooting Common Issues
Taylor thermometers may exhibit issues like low batteries or inaccurate readings. Resetting to factory settings—using the RESET button—can resolve malfunctions and restore original functionality.
Low Battery Warnings and Replacement
Taylor cooking thermometers utilize batteries to power their functions, and a low battery can significantly impact accuracy. Recognizing the warning signs is crucial for consistent performance. While specific indicators vary by model, a common signal is a dimming display or fluctuating temperature readings. Some thermometers may even display a “Low Battery” icon directly on the screen.
When a low battery is detected, immediate replacement is recommended. Refer to your thermometer’s manual for the correct battery type – typically AAA or button cell batteries. Carefully open the battery compartment, usually located on the back or side of the unit. Ensure correct polarity when inserting the new battery, matching the positive (+) and negative (-) terminals as indicated.
After replacement, test the thermometer to confirm proper operation. If the low battery warning persists, double-check the battery installation and consider trying a different brand. Regularly replacing batteries, even before a warning appears, can prevent interruptions during critical cooking moments and maintain reliable temperature measurements.
Inaccurate Temperature Readings ⸺ Causes and Solutions
Taylor thermometers are designed for accuracy, but inaccurate readings can occur. Common causes include improper probe placement – avoid contact with bone, fat, or gristle, as these don’t reflect internal temperature. A low battery can also lead to inconsistencies; ensure a fresh battery is installed. Calibration issues, though less frequent, can arise over time.
To troubleshoot, first verify correct probe positioning, ensuring it’s inserted at least one inch into the food. If readings remain off, attempt a recalibration if your model supports it (consult the manual). For wireless models, check the sensor connection and range. Interference from other devices can sometimes affect readings.
If problems persist, resetting the thermometer to factory settings (if applicable) might resolve the issue. If none of these steps work, contact Taylor customer support for assistance. Remember, consistent accuracy relies on proper usage and maintenance.
Resetting to Factory Settings (If Applicable)
Some Taylor thermometer models offer a reset function to restore original factory settings, useful for resolving persistent malfunctions or incorrect configurations. This process effectively clears any user-defined preferences and returns the device to its initial state. However, not all Taylor thermometers include this feature; consult your specific model’s manual to confirm availability.
For models that support resetting, the procedure typically involves locating and pressing the “RESET” button – often a small, recessed button on the back or inside the battery compartment. A single press usually initiates the reset. After resetting, you’ll need to re-enter your desired settings, such as temperature units (°F or °C) and any wireless sensor pairings.
Be aware that resetting will erase all custom settings. Before resetting, consider documenting your preferences for easier re-configuration. If you encounter difficulties or the reset doesn’t resolve the issue, contact Taylor’s customer support for further guidance.
Care and Maintenance
Taylor thermometers require gentle cleaning. Avoid harsh chemicals; a damp cloth suffices. Proper storage prevents damage, and warranty support is available for issues.
Cleaning Your Taylor Thermometer
Maintaining the cleanliness of your Taylor cooking thermometer is crucial for accurate readings and longevity. After each use, it’s best practice to wipe the stainless steel probe thoroughly with a warm, damp cloth. This removes any food residue that could potentially harbor bacteria or interfere with temperature sensing.
Avoid abrasive cleaners, scouring pads, or harsh chemicals, as these can damage the probe’s surface and compromise its accuracy. For stubborn residue, a mild dish soap solution can be used, but ensure it’s completely rinsed off with clean water afterward.
The body of the thermometer, whether plastic or metal, can also be wiped down with a damp cloth. Never submerge the entire thermometer in water, as this could damage the electronic components. Pay particular attention to cleaning the area where the probe connects to the body, as food particles can accumulate there. Regular cleaning ensures hygienic operation and extends the life of your Taylor thermometer.

Proper Storage Techniques
Correct storage significantly impacts the lifespan and functionality of your Taylor cooking thermometer. When not in use, store the thermometer in a cool, dry place, away from direct sunlight and extreme temperatures. Avoid storing it in areas with high humidity, as this can potentially damage the electronic components.
For models with stainless steel probes, consider storing them in a protective sheath or cover to prevent damage and maintain hygiene. Do not store the thermometer with the probe submerged in any liquid. If the thermometer uses batteries, it’s advisable to remove them before long-term storage to prevent corrosion and potential leakage.
Avoid placing heavy objects on top of the thermometer, as this could cause physical damage. A dedicated drawer or storage container is ideal. Proper storage ensures your Taylor thermometer remains accurate and reliable for years to come, providing consistent performance whenever you need it.
Warranty Information and Support
Taylor stands behind the quality of its products. Most Taylor cooking thermometers are covered by a limited warranty against manufacturing defects. The warranty period varies depending on the specific model, so retaining your proof of purchase is crucial. Check the documentation included with your thermometer for detailed warranty terms and conditions.
For warranty claims or support inquiries, Taylor offers several avenues for assistance. You can visit the official Taylor website for frequently asked questions, troubleshooting guides, and contact information. Their customer support team can be reached via phone or email, providing expert guidance and resolving any issues you may encounter.
Additionally, many retailers that sell Taylor products offer their own support services. Keep your model number handy when contacting support to expedite the process. Taylor is committed to ensuring customer satisfaction and providing reliable support for all its products.