
Nikon D610 Instruction Manual: A Comprehensive Guide
Welcome! This detailed manual assists new Nikon D610 owners, offering a thorough understanding of features and functions for optimal photographic mastery․
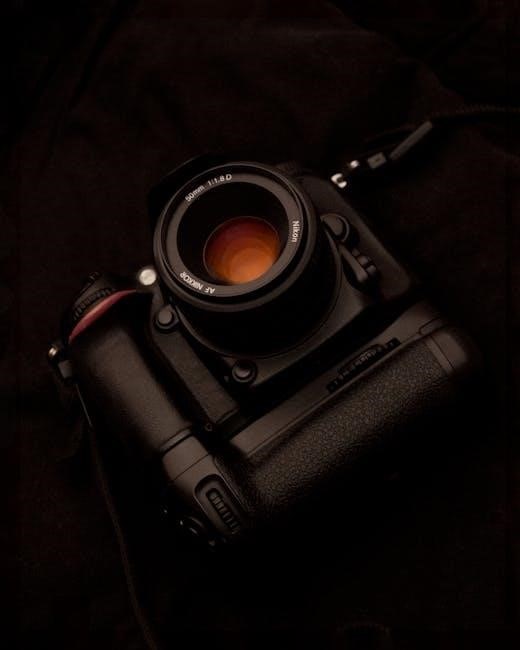
Congratulations on acquiring the Nikon D610, a full-frame DSLR celebrated for its exceptional image quality and robust performance․ This manual serves as your comprehensive companion, guiding you through every aspect of your camera․ From initial setup to advanced techniques, we’ll unlock the D610’s potential․

Explore masterful control and precision, benefiting from a community dedicated to Nikon products and photographic culture․ This guide ensures a smooth and rewarding photographic journey, empowering you to capture stunning images․
Unboxing and Initial Setup
Carefully unpack your Nikon D610, verifying all included components: camera body, battery, charger, strap, and documentation․ Insert the battery and memory card․ Connect the charger and fully charge the battery before first use․ Set the language, date, and time via the setup menu․
Register your camera to access support and updates․ Familiarize yourself with the camera’s basic layout and controls for a seamless start to your photographic adventure․
Understanding the Camera Body
The Nikon D610 boasts a robust, ergonomic design․ Its construction prioritizes comfortable handling during extended shooting sessions․ Key areas include the mode dial, shutter button, and control dials․ The rear panel houses the LCD screen and navigational buttons․
Understanding the placement of these elements is crucial for efficient operation․ Explore the body to become familiar with its ports and access points for customization․
Front and Rear Panel Overview
The front panel features the lens mount, autofocus-assist illuminator, and function button․ The rear panel showcases the LCD screen, diopter adjustment, and control buttons for menu navigation and image playback․

Locate the memory card slot and connectivity ports․ Familiarize yourself with the button layout for quick access to essential settings․ Understanding these panels unlocks efficient camera control and streamlines your workflow․
Top Panel Controls and Functions
The top panel houses the mode dial, main command dial, shutter release button, and exposure compensation dial․ These controls provide direct access to shooting modes, settings adjustments, and image capture․
The on/off switch and ISO button are also conveniently located․ Mastering these functions enables swift adjustments without navigating menus, enhancing your shooting experience and responsiveness in dynamic environments․
Basic Camera Settings
Initial setup involves setting the date, time, and language for accurate file naming and display․ Image quality and size are crucial choices; RAW offers maximum editing flexibility, while JPEG provides smaller file sizes․
Understanding these fundamental settings ensures proper image recording and workflow․ Explore the menu system to personalize these options according to your photographic preferences and intended use․
Setting the Date, Time, and Language
Access the setup menu via the camera’s main menu․ Navigate to the date/time settings and input the correct information using the directional pad and ‘OK’ button․ Accurate date and time stamping are vital for organizing your photos chronologically․
Similarly, select your preferred language for the camera’s display and menu system, ensuring a comfortable user experience․ These initial settings establish a foundation for efficient operation․
Choosing Image Quality and Size
Navigate to the shooting menu to access image quality settings․ Select from RAW, JPEG (Large, Medium, Small), or RAW+JPEG combinations․ RAW files offer maximum editing flexibility, while JPEGs are convenient for immediate use․
Image size determines the resolution; larger sizes capture more detail, ideal for prints or cropping․ Consider storage capacity when choosing – higher quality and size demand more memory card space․
Shooting Modes Explained
The Nikon D610 offers diverse shooting modes to suit various skill levels and scenarios․ Auto mode simplifies settings for beginners, while Aperture Priority (A) controls depth of field․ Shutter Priority (S) manages motion blur, and Manual (M) grants full creative control․
Explore Scene modes for pre-defined settings optimized for landscapes, portraits, and more․ Understanding each mode unlocks your camera’s potential․
Auto Mode for Beginners
Auto mode on the Nikon D610 is perfect for those new to photography․ The camera automatically selects optimal settings for exposure, focus, and white balance, simplifying the shooting process․ It’s ideal for everyday snapshots and quickly capturing moments without needing technical expertise․
While convenient, explore other modes as you gain confidence to unlock greater creative control․
Aperture Priority (A) Mode
Aperture Priority (A) mode allows you to control the lens aperture (f-stop), influencing depth of field․ A wider aperture (lower f-number) creates shallow depth of field, blurring the background – excellent for portraits․ Conversely, a narrower aperture (higher f-number) increases depth of field, keeping more in focus – ideal for landscapes․
The camera automatically adjusts shutter speed for proper exposure․
Shutter Priority (S) Mode
Shutter Priority (S) mode grants control over the shutter speed, dictating motion blur or freezing action․ Faster shutter speeds (e․g․, 1/1000s) freeze fast-moving subjects like sports, while slower speeds (e․g․, 1/30s) create motion blur, conveying a sense of movement․
The camera automatically selects the appropriate aperture for correct exposure, balancing light intake․
Manual (M) Mode
Manual (M) mode provides complete creative control, allowing independent adjustment of both shutter speed and aperture․ This mode is ideal for challenging lighting conditions or when a specific look is desired, demanding a thorough understanding of the exposure triangle․
Photographers directly manage ISO, aperture, and shutter speed for precise results․
Focusing System
The Nikon D610 boasts a sophisticated autofocus (AF) system with 39 focus points, ensuring sharp images across the frame․ Explore various AF-area modes – Single-point, Dynamic-area, 3D-tracking – to suit different subjects and shooting scenarios․ Fine-tune AF sensitivity for optimal performance․
Mastering manual focus is also crucial for precise control, especially in low light․
Autofocus Modes and Settings
The D610 offers AF-S (single servo) for stationary subjects, AF-C (continuous servo) for tracking moving subjects, and Auto-servo for automatic selection․ Explore focus point selection methods: Single-point, Dynamic-area (9, 21, or 39 points), and 3D-tracking․ Adjust AF sensitivity to optimize responsiveness based on subject movement․ Utilize focus lock (AF-ON button) for independent focusing and recomposing․
Manual Focus Operation
Switch the lens to ‘M’ (manual) mode for complete control over focusing․ Rotate the focusing ring on the lens barrel to achieve sharpness, observing the image on the LCD screen or through the viewfinder․ Utilize Live View with zoom for precise critical focus․ Enable focus peaking in Live View to highlight in-focus areas․ Remember, manual focus is ideal for static subjects or challenging autofocus scenarios;
Metering Modes
The Nikon D610 offers three primary metering modes: Matrix, Center-weighted, and Spot․ Matrix metering evaluates the entire scene for balanced exposure․ Center-weighted prioritizes the center of the frame, diminishing influence towards the edges․ Spot metering measures light from a very small area, ideal for tricky lighting․ Selecting the appropriate mode ensures accurate exposure based on your photographic intent and scene conditions․
Matrix Metering
Matrix metering, Nikon’s default, analyzes the entire frame using a 420-pixel RGB sensor․ It considers brightness and color distribution to calculate exposure․ This mode excels in most situations, providing balanced results for general photography․ It’s particularly effective with scenes containing varied lighting․ However, for specific scenarios, alternative metering modes might yield better results, offering greater control․
Center-Weighted Metering
Center-weighted metering prioritizes the central area of the frame for exposure calculation, giving it approximately 75% weighting․ The surrounding areas contribute the remaining 25%․ This mode is beneficial when your subject is centrally located and you want to ensure accurate exposure for it, minimizing the influence of bright or dark surroundings․ It’s a versatile option for portraits and similar subjects․
Spot Metering
Spot metering precisely measures light from a very small area – approximately 2․5% of the frame – centered on your chosen focus point․ This mode is ideal for challenging lighting situations where accurate exposure of a specific subject detail is crucial․ It’s particularly useful when photographing subjects against very bright or dark backgrounds, ensuring correct exposure for the intended area․
Working with Lenses
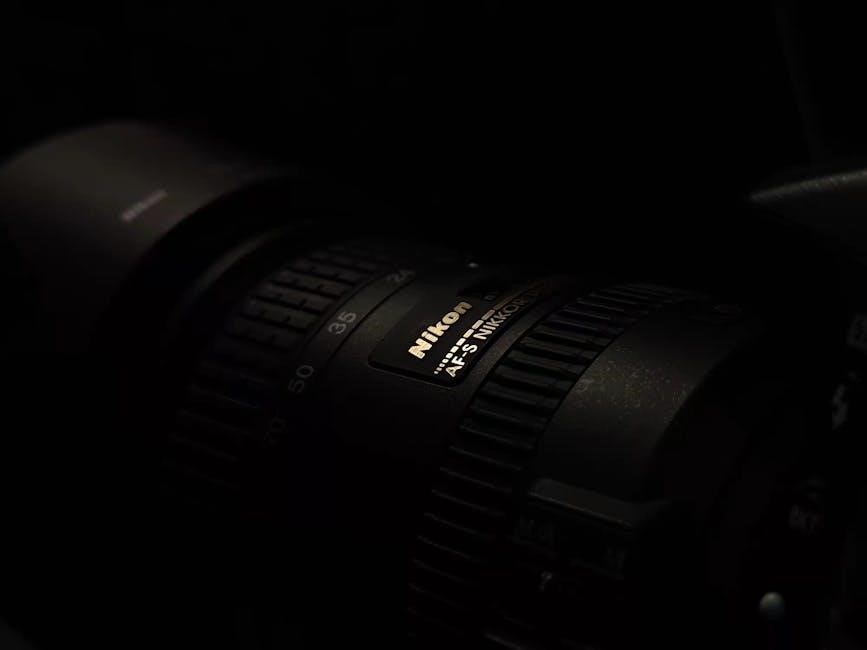
Nikon’s extensive range of Nikkor lenses are designed for optimal performance with the D610․ Compatibility spans various focal lengths and apertures, catering to diverse photographic needs․ Attaching a lens involves aligning the lens markings with the camera body, followed by a clockwise rotation until a click confirms secure mounting․ Careful removal, using the lens release button, prevents damage․
Compatible Nikkor Lenses
The Nikon D610 supports a vast array of Nikkor lenses, including those from the classic F-mount series․ This encompasses both autofocus and manual focus options․ Lenses like the 70-210mm f/4, introduced in 1986, demonstrate Nikon’s long-standing lens innovation․ Modern lenses offer advanced features, while older models provide a unique aesthetic․ Ensure compatibility for optimal image quality and camera functionality․
Lens Attachment and Removal
To attach a Nikkor lens, align the mounting index on the lens with that on the camera body, then gently rotate clockwise until it clicks securely․ For removal, press the lens release button on the camera body and rotate the lens counterclockwise․ Always handle lenses with care to avoid damage․ Proper attachment ensures optimal image quality and prevents issues․
Flash Photography
The Nikon D610 features a built-in flash for supplemental lighting, useful in low-light situations․ It also supports external flashes for more powerful and versatile illumination․ Explore flash modes like TTL and manual for creative control․ Troubleshooting a non-firing flash involves checking battery levels and flash settings within the camera menu․ External flash compatibility expands your photographic possibilities․
Built-in Flash Features
The D610’s integrated flash offers several convenient features․ Utilize flash modes like Auto, Auto with Red-Eye Reduction, Fill-Flash, and Manual․ Adjust flash compensation to fine-tune brightness․ Understand the flash range and guide number for optimal results․ If the flash isn’t firing, verify settings and battery status․ The built-in flash is ideal for quick, on-camera lighting solutions․
External Flash Compatibility
The Nikon D610 supports a wide range of Nikon Speedlights for advanced lighting control․ Utilize the hot shoe or optional wireless triggers for off-camera flash․ Explore features like TTL, manual mode, and high-speed sync․ Ensure compatibility with the D610’s i-TTL system for precise exposure․ External flashes offer greater power, flexibility, and creative possibilities compared to the built-in flash․
Navigating the Menu System
The Nikon D610’s menu system is logically organized into categories like Shooting, Display, Setup, and Custom Settings․ Use the multi-selector and buttons to navigate․ Customizing menu settings allows tailoring the camera to your preferences․ Understanding menu categories is crucial for efficient operation․ Explore options for image quality, autofocus, metering, and more․ A well-structured menu ensures quick access to essential functions․

Customizing Menu Settings
Personalize your Nikon D610 experience by adjusting menu settings to match your shooting style․ Modify autofocus modes, metering options, and image quality parameters․ Customize button assignments for quicker access to frequently used functions․ Explore custom picture controls to achieve desired color and tone․ Save personalized settings as presets for easy recall․ Tailoring the menu enhances workflow and creative control, optimizing the camera for individual needs․

Understanding Menu Categories
Navigate the Nikon D610’s menu system efficiently by recognizing its key categories․ The Setup menu handles basic camera settings like date, time, and language․ Shooting menus control image quality, focus, and metering․ Custom Settings refine camera behavior․ Playback menus manage image review and deletion․ Explore each category to unlock the D610’s full potential․ Familiarity with the menu structure streamlines adjustments and maximizes control․
Image Review and Playback
Effortlessly review captured images on the D610’s LCD screen․ Utilize the playback buttons to scroll through photos and zoom in for detailed inspection․ The display provides essential shooting information like settings and histogram․ To manage storage, easily delete unwanted images individually or in batches․ This process ensures efficient memory card usage and streamlined workflow, allowing you to focus on capturing stunning photographs․
Viewing Images on the LCD Screen
The Nikon D610’s LCD screen offers a clear and vibrant display for reviewing your photographs․ Press the playback button to enter review mode․ Use the multi-selector to navigate between images․ Zoom functionality allows detailed inspection of focus and clarity․ Information displayed includes file number, shooting data, and a helpful histogram for assessing exposure․ Rotate images for comfortable viewing and utilize display modes․
Deleting Images
To delete images on your Nikon D610, enter playback mode using the playback button․ Select the image(s) you wish to remove․ Press the delete button – a confirmation dialogue will appear․ You can delete single images, or multiple images simultaneously for efficient memory card management․ Be cautious, as deleted images are typically unrecoverable․ Ensure you’ve backed up important photos before deleting!
Connectivity and Data Transfer
Transferring photos from your Nikon D610 is straightforward․ Connect the camera to your computer using a USB cable․ Select ‘Mass Storage’ mode on the camera for easy file access․ Alternatively, utilize a compatible memory card reader for faster transfer speeds․ Ensure proper drivers are installed on your computer for seamless connectivity․ Regularly back up your images to prevent data loss!
Connecting to a Computer
Establishing a connection between your Nikon D610 and a computer is simple․ Use the provided USB cable, plugging one end into the camera and the other into your computer’s USB port․ Power on the D610, then select ‘Mass Storage’ mode within the camera’s menu․ Your computer will recognize the camera as a removable drive, allowing easy file transfer․ Ensure appropriate drivers are installed for optimal performance․
Using Memory Cards
Compatible memory cards for the Nikon D610 include SD, SDHC, and SDXC cards․ Insert the card into the slot located on the camera’s side, ensuring correct orientation․ Format the card within the camera for optimal performance and compatibility․ Regularly back up your images to a computer or external drive to prevent data loss․ Always eject the card safely before removal to avoid corruption․
Troubleshooting Common Issues
If the flash isn’t firing, check battery levels and ensure the flash mode is set correctly․ For a frozen camera, try removing and reinserting the battery․ If issues persist, consult Nikon’s support resources․ A lack of Nital Card or receipt may complicate repairs, but troubleshooting steps can often resolve minor problems․ Regularly update firmware for optimal performance and stability․
Flash Not Firing
If your Nikon D610’s flash fails to activate, first verify sufficient battery charge․ Confirm the flash mode isn’t set to off or a specific setting incompatible with your scene․ Check compatibility if using an external flash unit․ Ensure the camera and flash contacts are clean․ A missing Nital Card might affect warranty service, so attempt basic troubleshooting before seeking professional help․
Camera Freezing or Not Responding
Should your Nikon D610 become unresponsive, attempt a soft reset by turning the camera off and on again․ If that fails, remove and reinsert the battery and memory card․ Ensure the card isn’t write-protected or damaged․ A full reset to factory defaults (via the menu) might resolve persistent issues, but will erase custom settings․ Seek professional assistance if problems continue․
Care and Maintenance
Proper care extends your Nikon D610’s lifespan․ Regularly clean the body with a soft, dry cloth; avoid liquids or abrasive cleaners․ Use a blower to remove dust from the sensor․ Store the camera in a dry, dust-free environment․ Charge the battery fully before extended periods of inactivity․ Inspect cables for damage and handle the camera with care to prevent accidental drops or impacts․
Cleaning the Camera Body and Lens
Maintain optimal image quality with diligent cleaning․ Use a soft, lint-free cloth to gently wipe the camera body, avoiding harsh chemicals․ For the lens, employ a lens brush to remove loose dust, followed by lens cleaning fluid and a microfiber cloth․ Circular motions are best․ Never apply fluid directly to the lens; always dampen the cloth․ Protect both from excessive moisture and direct sunlight․
Battery Care and Charging
Maximize battery life with proper care․ Utilize the supplied charger for optimal charging; avoid third-party alternatives․ Store batteries in a cool, dry place when not in use․ Do not short-circuit or disassemble the battery․ Fully charge before initial use and avoid complete discharge to prolong lifespan․ Temperature extremes can affect performance, so keep batteries within recommended ranges․
Advanced Features
Unlock your D610’s full potential! Explore Live View for precise composition and focusing on the LCD screen․ Experiment with Time-Lapse Photography to capture stunning sequences over extended periods․ Master features like multiple exposures and in-camera editing for creative control․ These advanced tools empower you to push boundaries and achieve professional-quality results with your Nikon D610․
Live View Shooting
Experience precise control! Live View on the Nikon D610 displays the image directly on the LCD screen, enabling accurate composition and manual focusing․ Utilize the magnified view for critical sharpness․ This mode is ideal for macro photography or situations demanding meticulous focus․ Remember battery consumption is higher during Live View operation, so plan accordingly for extended shooting sessions․
Time-Lapse Photography
Capture the passage of time! The Nikon D610 facilitates stunning time-lapse sequences․ Utilize the built-in intervalometer function to automatically capture images at pre-set intervals․ Combine these images using third-party software to create captivating videos showcasing slow changes․ Ensure a stable tripod and sufficient battery power for longer durations․ Experiment with different intervals to achieve desired effects!