
Brother XL-5130 Manual: A Comprehensive Guide
This guide offers detailed instructions for the Brother XL-5130 sewing machine, providing a PDF download for convenient access to all features and troubleshooting.
The Brother XL-5130 is a popular, user-friendly sewing machine designed for both beginners and experienced sewists. This machine offers a blend of essential features and reliable performance, making it ideal for a wide range of sewing projects – from simple alterations to crafting beautiful garments. Understanding your machine begins with accessing the comprehensive manual, readily available as a PDF download.
This manual serves as your primary resource, detailing everything from initial setup and operation to advanced techniques and maintenance. It’s specifically designed to help you unlock the full potential of your XL-5130. The manual’s troubleshooting section is particularly valuable, addressing common issues and providing clear solutions, saving you time and frustration. Familiarizing yourself with the manual ensures a smooth and enjoyable sewing experience.
What’s Included in the Manual
The Brother XL-5130 manual, available as a downloadable PDF, is a thorough resource covering all aspects of your sewing machine. Expect detailed guidance on initial setup, including unboxing and preparing the machine for its first use. It features comprehensive parts identification diagrams, allowing you to quickly locate and understand each component.
Beyond the basics, the manual provides step-by-step instructions for essential sewing techniques like threading, bobbin winding, and stitch selection. A dedicated section outlines stitch guides and applications, showcasing the versatility of the XL-5130. Crucially, a robust troubleshooting section addresses common problems, offering solutions to ensure smooth operation. You’ll also find safety precautions and maintenance instructions within this valuable document.
Downloading the Brother XL-5130 PDF Manual
Accessing the Brother XL-5130 manual is straightforward – it’s readily available as a digital PDF download. This allows for instant access on your computer, tablet, or smartphone, eliminating the need for a physical copy. You can conveniently save the file for future reference and print specific sections as needed, saving paper and resources.
To view the PDF, you’ll require the Adobe Acrobat Reader software, which is freely available for download if you don’t already have it installed. Several websites offer the manual for download, ensuring easy access to this essential resource. Downloading provides speedy delivery and allows you to quickly find solutions to any questions or issues you may encounter with your Brother XL-5130 sewing machine.

Getting Started with Your Sewing Machine
Begin by unboxing, identifying parts, and powering on your Brother XL-5130; the manual provides clear guidance for initial setup and basic operation.
Unboxing and Initial Setup
Carefully unpack your new Brother XL-5130 sewing machine, ensuring all components are present. The box should contain the machine itself, a power cord, a foot controller, various presser feet (standard, buttonhole, zipper – check your model’s specifics), bobbins, needle set, screwdriver, and the instruction manual. Before connecting the power, inspect the machine for any shipping damage.
Position the machine on a stable, flat surface with adequate space for operation. Connect the power cord and foot controller. Initially, familiarize yourself with the machine’s basic parts as outlined in the manual. This includes identifying the handwheel, stitch selection dial, bobbin winder, and presser foot lever. Refer to the manual for detailed diagrams. Proper initial setup, guided by the manual, ensures smooth and safe operation.
Machine Parts Identification
The Brother XL-5130 features several key components. The manual provides detailed diagrams; familiarize yourself with these. The power switch controls operation, while the foot controller regulates sewing speed. The stitch selection dial allows choosing various stitch patterns. The stitch length and width controls adjust stitch parameters.
The presser foot lever raises and lowers the presser foot, essential for fabric handling. The bobbin winder prepares bobbins for use. The handwheel enables manual control, useful for precise positioning. Identify the needle clamp screw, securing the needle. Locate the tension dial, influencing thread tension. Understanding each part, as detailed in the manual, is crucial for effective operation and maintenance of your Brother XL-5130 sewing machine.
Powering On and Basic Operation
To power on your Brother XL-5130, ensure the power switch is in the “off” position before plugging it into a grounded outlet. Then, flip the switch to “on”. Depress the foot pedal to begin sewing; releasing it stops the machine. Always use the foot controller for speed regulation.
Begin with practice fabric to get accustomed to the machine’s operation. Select a straight stitch using the stitch selection dial. Adjust stitch length as needed. Gently guide the fabric under the presser foot, avoiding pushing or pulling. Refer to the manual for detailed instructions on initial setup and safe operation; Proper technique, as outlined in the manual, ensures smooth and efficient sewing with your Brother XL-5130.

Understanding the Control Panel
The control panel features a stitch selection dial, length and width controls, and a reverse stitch lever for versatile sewing options, as detailed in the manual.
Stitch Selection Dial
The Stitch Selection Dial on your Brother XL-5130 is the primary control for choosing the desired stitch pattern. Rotating the dial allows you to cycle through a variety of built-in stitches, each suited for different sewing applications. The manual clearly illustrates each stitch and its corresponding number on the dial.
Understanding the stitch numbers is crucial for accurate project execution. Common stitches include straight stitch, zigzag stitch, and various decorative stitches. The manual provides detailed guidance on when to use each stitch type, offering suggestions for fabric types and project ideas.
Pay close attention to the stitch width and length settings, as these interact with the selected stitch to create the final result. The manual emphasizes the importance of testing stitches on scrap fabric before beginning your project to ensure optimal settings. Proper stitch selection is key to achieving professional-looking results with your Brother XL-5130.
Stitch Length and Width Controls
The Brother XL-5130 features dedicated controls for adjusting both stitch length and stitch width, allowing for customization based on fabric and desired effect. The stitch length control determines the distance between each stitch, impacting the strength and appearance of the seam. Shorter stitch lengths are ideal for delicate fabrics or areas requiring extra reinforcement, while longer lengths are suitable for basting or gathering.
Similarly, the stitch width control adjusts the breadth of stitches like zigzag, influencing the fabric coverage and stretch. The manual provides a comprehensive chart detailing recommended settings for various stitch types and materials. Experimenting with these controls is encouraged to achieve optimal results.
Always test adjustments on scrap fabric before sewing your project. Incorrect settings can lead to puckering, skipped stitches, or weakened seams. Refer to the manual for detailed explanations and visual aids to master these essential controls.
Reverse Stitch Lever Function
The Brother XL-5130 utilizes a reverse stitch lever, crucial for securing seams at the beginning and end of a sewing line. Engaging this lever reverses the stitch direction, effectively backstitching over the initial stitches. This prevents unraveling and ensures a durable finish. The manual clearly illustrates the lever’s location and operation, emphasizing its importance for garment construction and other sewing projects.
Typically, a few reverse stitches are sufficient to secure a seam. Prolonged reverse stitching can create bulkiness or distortion. The lever is usually held down during the desired number of reverse stitches, then released to resume forward sewing.
Consult the manual for specific recommendations regarding reverse stitch length and frequency based on fabric type and project requirements. Mastering this function is vital for achieving professional-quality results with your XL-5130.

Basic Sewing Techniques
The manual details essential techniques like threading, bobbin winding, and insertion, enabling users to quickly begin sewing projects with their XL-5130.
Threading the Machine
Proper threading is crucial for optimal sewing performance with your Brother XL-5130. The manual provides a step-by-step visual guide, beginning with raising the presser foot and thread tension to its highest setting. Follow the numbered path indicated on the machine, guiding the thread through each guide and tension disc.
Ensure the thread is securely seated in the tension disc for consistent stitch quality. Next, lead the thread through the take-up lever, and finally, thread the needle from front to back. The manual emphasizes the importance of using the correct needle type and size for your fabric. Incorrect threading can lead to skipped stitches, thread breakage, and overall poor sewing results. Refer to the diagrams in the manual for clarity, and practice until you are comfortable with the process.
Winding the Bobbin
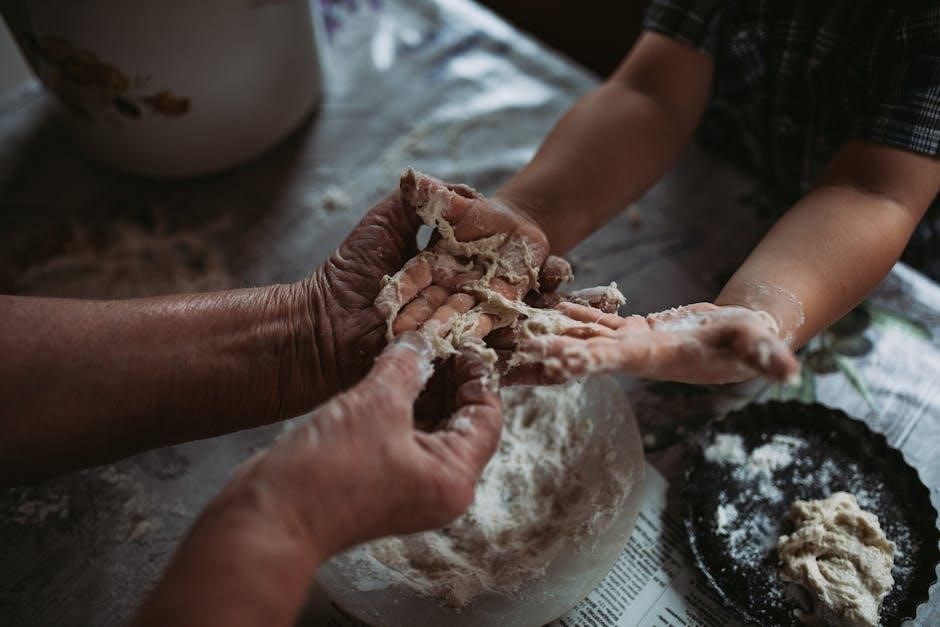
Winding the bobbin correctly is essential for smooth sewing on your Brother XL-5130. Begin by placing the thread spool on the spool pin and securing it with the spool cap. Next, guide the thread through the thread guide, and then around the bobbin several times, ensuring a firm start.
Place the bobbin onto the bobbin winder spindle and push it to the right to engage the winding mechanism. Press the foot pedal gently to start winding; the machine will automatically stop when the bobbin is full. The manual stresses not overfilling the bobbin, as this can cause issues. Always use quality thread for consistent winding. Refer to the manual’s diagrams for a clear visual guide, and remember to disengage the bobbin winder before resuming regular sewing.
Inserting the Bobbin
Inserting the bobbin correctly into your Brother XL-5130 is crucial for proper stitch formation. Locate the bobbin case beneath the needle plate. Gently pull out the bobbin case and insert the wound bobbin, ensuring the thread unwinds in a clockwise direction, as detailed in the manual.
Guide the thread through the tension spring on the bobbin case, then reinsert the bobbin case fully into the machine until it clicks into place. Finally, draw up the bobbin thread by holding the needle thread and gently turning the handwheel towards you. The manual emphasizes checking the thread path for smooth operation. Incorrect insertion can lead to skipped stitches or tangled thread, so consult the diagrams for accurate placement.

Stitch Guide and Applications
Explore diverse stitch options with the Brother XL-5130, utilizing the manual for optimal settings and applications for various fabrics and projects.
Straight Stitch – Uses and Settings
The Brother XL-5130’s straight stitch is a foundational technique, perfect for seams, topstitching, and basting. This versatile stitch excels on woven fabrics, creating durable and clean lines. Refer to your manual for recommended settings based on fabric weight; lighter fabrics require shorter stitch lengths (around 2.0-2.5mm) for strength, while heavier fabrics benefit from longer lengths (3.0-3.5mm).
Adjusting the stitch length impacts the seam’s appearance and durability. Shorter stitches offer greater security but can cause puckering on delicate materials. The manual details how to select the appropriate stitch length using the control panel. For topstitching, a slightly longer stitch length and increased thread tension are often preferred for a more pronounced effect. Always test stitch on a scrap piece of fabric before beginning your project to ensure optimal results and prevent errors. The XL-5130 manual provides detailed diagrams illustrating these adjustments.
Zigzag Stitch – Uses and Settings
The Brother XL-5130’s zigzag stitch offers incredible versatility, ideal for finishing raw edges, creating decorative applications, and sewing stretch fabrics. Unlike a straight stitch, the zigzag prevents fabric from unraveling, making it essential for knit materials. Your manual details adjusting both stitch length and width. A narrower zigzag (width 1.0-2.0mm) is suitable for edge finishing, while a wider zigzag (3.0-5.0mm) excels in decorative stitching.
Experiment with different settings on scrap fabric, consulting the manual’s stitch guide for optimal results. For stretch fabrics, a slightly longer stitch length and reduced presser foot pressure are recommended to avoid puckering. The XL-5130 manual illustrates how to modify these settings via the control panel. Remember, the correct tension is crucial for a balanced zigzag; refer to the troubleshooting section if encountering looping or uneven stitches.
Buttonhole Stitch – Step-by-Step Guide
Creating buttonholes with your Brother XL-5130 is simplified with its automatic buttonhole feature; First, attach the buttonhole foot (refer to your manual for correct attachment). Select the buttonhole stitch on the stitch selection dial. Next, position your fabric, ensuring the buttonhole placement aligns with the markings on the needle plate – the manual provides a clear diagram.
Place the button on the buttonhole foot and adjust the buttonhole size using the control dial, as detailed in the XL-5130 manual. The machine will automatically sew the buttonhole, stopping to allow for corner pivots. Always test on scrap fabric first! The manual’s troubleshooting section addresses common issues like uneven buttonholes or thread breakage during this process.
Maintenance and Troubleshooting
Regular cleaning and lubrication, as outlined in the manual, ensure optimal performance. The XL-5130 manual’s troubleshooting section addresses common sewing issues.
Cleaning the Machine
Maintaining a clean Brother XL-5130 is crucial for its longevity and performance. Dust and lint buildup can significantly impact stitch quality and cause mechanical issues. Always power off and unplug the machine before commencing any cleaning procedures. Begin by removing the needle and presser foot. Use a soft brush – often included with the machine – to gently remove lint from the bobbin area, feed dogs, and around the needle plate.
For more stubborn lint, a vacuum cleaner with a brush attachment can be utilized, exercising caution not to damage delicate components. The exterior of the machine can be wiped down with a slightly damp cloth. Avoid using harsh chemicals or abrasive cleaners, as these can damage the finish. Refer to your XL-5130 manual for specific cleaning recommendations and diagrams illustrating key areas requiring attention. Regular cleaning, as detailed in the manual, prevents malfunctions and ensures smooth operation.
Oil Points and Lubrication
Proper lubrication is essential for the smooth operation of your Brother XL-5130 sewing machine. However, over-oiling can be just as detrimental as under-oiling, attracting dust and causing sticky buildup. Consult your XL-5130 manual to identify specific oil points – typically located around the bobbin area, hook mechanism, and motor shaft. Use only sewing machine oil, as other lubricants may damage internal components.
Apply oil sparingly, using a needle-nose oiler for precise application. After oiling, operate the machine slowly for a few minutes to distribute the lubricant evenly. Wipe away any excess oil to prevent staining fabric. The manual provides detailed diagrams illustrating the correct oiling points and frequency; Regular, careful lubrication, as outlined in the manual, will extend the life of your machine and maintain optimal performance.
Common Problems and Solutions (Troubleshooting Section)
The Brother XL-5130 manual features a dedicated troubleshooting section addressing frequent issues. Common problems include thread bunching, skipped stitches, and the machine failing to power on. For thread issues, ensure correct threading, proper bobbin insertion, and appropriate thread tension. Skipped stitches often indicate a bent or dull needle – replace it! If the machine won’t power on, check the power cord and ensure it’s securely connected.
The manual provides step-by-step solutions for each problem, often including diagrams. It also covers error messages displayed on the machine, if applicable. Before seeking professional repair, thoroughly review this section; many issues can be easily resolved with simple adjustments outlined in your XL-5130’s PDF manual.

Advanced Features & Techniques
Explore specialized techniques like adjusting presser foot pressure and utilizing optional feet, enhancing your sewing projects with the Brother XL-5130;
Adjusting Presser Foot Pressure
Presser foot pressure is crucial for achieving optimal stitch quality on various fabrics. The Brother XL-5130 allows you to fine-tune this setting to prevent issues like puckering, skipped stitches, or fabric feed problems. Lighter fabrics require less pressure, while heavier materials benefit from increased pressure to ensure consistent feeding.
To adjust the pressure, locate the pressure dial, typically found near the presser foot area. Experiment with different settings using a scrap of the fabric you intend to sew. Start with a lower setting and gradually increase it until the fabric feeds smoothly without distortion.
Incorrect pressure can lead to thread breakage or uneven stitches. Always test your adjustments before starting your project. Remember that the ideal setting depends on the fabric weight, type, and the thread used. Mastering this adjustment unlocks greater control and precision in your sewing endeavors with the XL-5130.
Using Optional Presser Feet
The Brother XL-5130’s versatility expands significantly with optional presser feet, enabling specialized sewing techniques. A zipper foot facilitates close-stitch zipper application, while a buttonhole foot automates precise buttonhole creation. A blind hem foot creates nearly invisible hems, perfect for delicate garments.
Other useful feet include an overcasting foot for finishing raw edges, a gathering foot for creating ruffles, and a quilting foot for even stitch distribution. Installing a new foot is simple: release the existing foot by pressing the release button, align the new foot with the shank, and push it up until it clicks into place.
Consult your XL-5130 manual for a complete list of compatible feet and their specific applications. Utilizing these feet unlocks creative possibilities and enhances the quality of your sewing projects, making the machine even more adaptable.
Free Motion Quilting with the XL-5130
The Brother XL-5130 allows for free motion quilting, offering creative control over stitch placement. First, attach the appropriate quilting foot – typically a hopping foot – which allows the fabric to move freely under the needle. Disengage the feed dogs by lowering the feed dog lever; this is crucial for unconstrained movement.
Lower the presser foot and gently move the fabric to guide the stitching. Consistent speed and even pressure are key to achieving smooth, flowing designs. Practice on scrap fabric to develop muscle memory and control. Adjust stitch length as needed for desired effect.
Refer to your XL-5130 manual for detailed instructions and troubleshooting tips. Free motion quilting unlocks artistic expression, transforming your sewing projects into unique quilted masterpieces.

Safety Precautions
Always prioritize safety when using the Brother XL-5130; follow electrical guidelines, avoid needle breakage, and adhere to general sewing machine safety rules.
General Safety Guidelines
Before operating your Brother XL-5130, carefully read the entire manual to understand all safety precautions. Always disconnect the power supply when threading, changing the needle, cleaning, or performing any maintenance. Never pull or push the fabric while sewing; let the machine feed the fabric naturally. Keep fingers away from the needle area during operation to prevent accidental injury.
Ensure the machine is placed on a stable, level surface during use. Do not operate the machine if it is damaged or malfunctioning. Avoid using excessive force when operating the machine. Regularly inspect the power cord for damage and replace it if necessary. Keep the machine out of reach of children. Never leave the machine unattended while it is plugged in. Always use the appropriate accessories and attachments for your sewing project.
Be mindful of moving parts and avoid loose clothing or jewelry that could get caught in the machine. Prioritize a safe and focused sewing environment.
Electrical Safety Information
To ensure safe operation of your Brother XL-5130, always verify the power supply matches the machine’s requirements. Never operate the machine with a damaged power cord or plug; replace them immediately. Avoid using extension cords if possible, and if necessary, ensure they are appropriately rated for the machine’s power consumption. Do not expose the machine to moisture or operate it with wet hands, as this poses an electrical shock hazard.
Always unplug the machine before cleaning or performing any maintenance. Never attempt to disassemble or repair the machine yourself; contact a qualified technician for assistance. Avoid placing the machine near flammable materials or sources of heat. Ensure the machine is properly grounded to prevent electrical shock. Do not overload electrical circuits with multiple appliances.
Regularly inspect the power cord for wear and tear, and discontinue use if damage is detected.
Avoiding Needle Breakage
Preventing needle breakage with your Brother XL-5130 requires careful attention to several factors. Always use the correct needle type and size for the fabric you are sewing; heavier fabrics necessitate stronger needles. Ensure the needle is properly inserted, fully pushed up into the needle clamp, and facing the correct direction. Avoid sewing over pins, as this can cause the needle to bend or break.
Never pull or push the fabric while sewing; let the machine feed the fabric naturally. Regularly check the needle for signs of damage, such as bending or dullness, and replace it as needed. Adjust the thread tension appropriately for the fabric and thread being used; Incorrect tension can strain the needle.
Avoid excessive sewing speed, especially with thick or difficult fabrics.