
Nikon Coolpix Camera User Manual: A Comprehensive Guide
Welcome! This manual provides detailed instructions for maximizing your Nikon Coolpix experience, covering all features and ensuring optimal image quality.
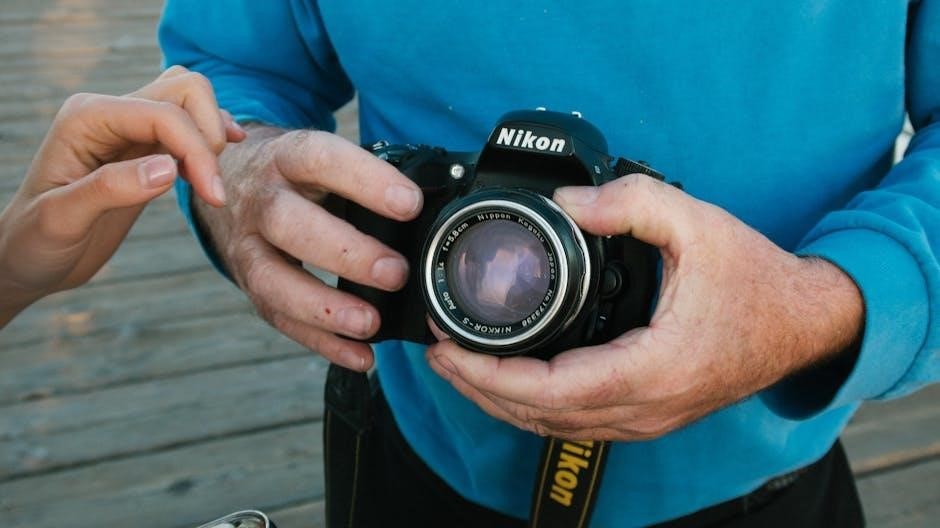
Congratulations on choosing the Nikon Coolpix! This compact digital camera is designed to deliver exceptional image quality and ease of use, perfect for capturing life’s precious moments. Whether you’re a beginner or an experienced photographer, the Coolpix offers a range of features to suit your needs.
This user manual will guide you through every aspect of your camera, from initial setup and basic operation to advanced settings and creative techniques. We’ll cover everything you need to know to take stunning photos and videos, explore different shooting modes, and share your creations with the world.
Prepare to unlock the full potential of your Nikon Coolpix and embark on a photographic journey filled with creativity and enjoyment!
Unboxing and Initial Setup

Let’s get started! Carefully unpack your Nikon Coolpix and verify that all components are present. Before first use, it’s crucial to properly charge the battery and insert a compatible memory card. The battery typically slides into a designated compartment on the camera’s base; connect it to the provided charger using the USB cable.
Once charged, insert the memory card (SD, SDHC, or SDXC) into the card slot, ensuring it clicks securely into place. Power on the camera and follow the on-screen prompts to set the language, date, and time. These initial steps will prepare your Coolpix for capturing amazing images!
Package Contents
Your Nikon Coolpix package should include: the Coolpix camera body, a rechargeable Li-ion battery (typically EN-EL20 or similar, depending on the model), a battery charger with a USB cable for charging via a wall adapter or computer, and a strap for secure handling.
Additionally, you’ll find a printed user manual (or a quick start guide with instructions to download the full manual online), warranty information, and potentially some software CDs or information on downloading software. Verify all items are present; if anything is missing, contact Nikon support immediately.
Charging the Battery
To charge the battery: connect the battery charger to a power source using the provided USB cable and AC adapter. Insert the battery into the charger, ensuring correct polarity (usually indicated by + and ー symbols). The charger’s indicator light will typically blink while charging and turn solid when fully charged.
Initial charging may take several hours. Avoid interrupting the charging process. Once fully charged, disconnect the charger from the power source. A fully charged battery provides a substantial number of shots, but performance decreases in cold weather.
Inserting the Memory Card
To insert a memory card: locate the memory card slot, usually on the side or bottom of the camera; Gently open the card slot cover. Insert the memory card (SD, SDHC, or SDXC – check your camera’s specifications) into the slot, ensuring the correct orientation – typically label-side up. Push the card in until it clicks into place.
Do not force the card. To remove the card, gently push it in once to eject it, then pull it out. Avoid touching the gold contacts on the card. Always format the card within the camera before first use for optimal performance.
Camera Overview: Buttons and Controls
Familiarizing yourself with the Coolpix’s layout is key to effortless operation. This section details the function of each button, dial, and control. We’ll break down the camera into its front, top, and rear panels for clarity. Understanding these elements allows for quick adjustments without navigating menus.
Expect to find controls for power, shutter release, zoom, mode selection, and menu access. The rear panel houses the LCD screen and buttons for playback, settings, and shooting options. Refer to the following sections for detailed explanations of each component.
Front Panel Features
The front panel primarily houses the lens and related components. You’ll find the zoom lever, used to adjust magnification for framing your shots. Many Coolpix models also include a flash unit located near the lens. Some models feature an AF-assist illuminator, which helps the camera focus in low-light conditions.
Be mindful of the lens when handling the camera; avoid touching the glass surface. The front panel is designed for minimal user interaction beyond zoom control. Protective lens covers are often included or available separately to prevent scratches and damage.
Top Panel Controls
The top panel typically features the power button, shutter release button, and the mode dial. The mode dial allows you to select various shooting modes, such as Auto, Scene, or Program. The shutter release button is used to capture photos and start/stop video recording.
Some models include a zoom control lever or buttons on the top panel for convenient operation. You might also find a dedicated button for quick access to frequently used settings. Familiarize yourself with the location and function of each control for efficient operation.
Rear Panel Layout
The rear panel houses the LCD screen for composing shots and reviewing images. Surrounding the screen are various buttons and controls. Commonly found are the menu button, providing access to camera settings, and directional buttons for navigating menus and selecting options.
A playback button allows you to review captured photos and videos. You’ll also likely find a button for controlling the display information shown on the LCD, and potentially a dedicated button for accessing frequently used features like flash settings or self-timer.
Basic Shooting Modes
Your Nikon Coolpix offers several shooting modes to simplify capturing different types of photos. Auto Mode is the simplest, letting the camera handle all settings for you – perfect for beginners! Scene Modes offer pre-configured settings optimized for specific situations like landscapes, sports, or night portraits.
Portrait Mode specifically focuses on capturing flattering images of people, often softening backgrounds. Explore these modes to quickly achieve great results without needing to understand complex camera settings. Experimenting with each mode will help you discover which best suits your photographic needs.
Auto Mode: Point-and-Shoot Simplicity
Auto Mode is the easiest way to start taking pictures with your Nikon Coolpix. Simply turn on the camera, point it at your subject, and press the shutter button halfway to focus, then fully to capture the image. The camera automatically selects the optimal settings for exposure, focus, and white balance.
This mode is ideal for everyday snapshots and situations where you don’t have time to adjust settings. While offering convenience, remember that Auto Mode provides less creative control. It’s a fantastic starting point for new users!
Scene Modes: Optimizing for Specific Situations
Scene Modes allow your Nikon Coolpix to tailor settings for common shooting scenarios. Access these modes via the mode dial or menu. Options include Portrait, Landscape, Sports, Night Portrait, Party, Beach, and Snow. Each mode pre-configures settings like aperture, shutter speed, and ISO for optimal results.
For example, Landscape prioritizes sharpness and vibrant colors, while Sports uses a faster shutter speed to freeze motion. Experiment with different scene modes to achieve the best possible image quality for each unique situation.
Portrait Mode: Capturing Stunning Portraits
Portrait Mode on your Nikon Coolpix is designed to capture flattering images of people. It achieves this by utilizing a wider aperture, creating a shallow depth of field that blurs the background – a technique known as bokeh. This effect isolates your subject, drawing attention to their face.
The camera also subtly softens skin tones for a more pleasing aesthetic. For best results, ensure good lighting and position your subject within the recommended focus range. Consider using the built-in flash for fill light if needed, but avoid harsh direct flash.
Understanding Camera Settings
Delving into settings unlocks your Coolpix’s full potential. Mastering these controls allows for creative expression and optimized image capture. Key settings include Image Quality, determining resolution and compression levels – higher settings yield larger, more detailed files.
ISO Sensitivity adjusts the camera’s light sensitivity; higher ISOs are useful in low light but can introduce noise; White Balance ensures accurate color reproduction under different lighting conditions. Experimenting with these settings is crucial for achieving desired results, adapting to various shooting scenarios.
Image Quality Settings (Resolution & Compression)

Image quality is defined by resolution and compression. Resolution, measured in megapixels, dictates image detail – higher megapixels mean larger prints and more cropping flexibility. Compression affects file size; Fine offers the best quality with larger files, while Normal and Basic reduce file size at the cost of some detail.
Choose settings based on intended use. For web sharing, Normal or Basic may suffice. For prints or extensive editing, Fine and a higher resolution are recommended. Understanding this balance ensures optimal image quality without unnecessary storage consumption.
ISO Sensitivity: Balancing Brightness and Noise
ISO controls your camera’s sensitivity to light. Lower ISO settings (e.g., ISO 100) are ideal for bright conditions, producing cleaner images with minimal noise (graininess). As light decreases, increase the ISO (e.g., ISO 800, 1600, or higher) to maintain a proper exposure.
However, higher ISOs introduce more noise. The Coolpix offers an Auto ISO mode, intelligently adjusting sensitivity. Manually controlling ISO allows creative control, prioritizing brightness or image quality depending on the scene. Experiment to find the best balance for your shooting situation.
White Balance: Achieving Accurate Colors
White balance (WB) ensures colors appear natural, regardless of the lighting conditions. Different light sources (sunlight, shade, fluorescent, incandescent) emit varying color temperatures. Incorrect WB results in color casts – images appearing too blue or yellow.
Your Coolpix offers several WB presets: Auto, Daylight, Cloudy, Fluorescent, Incandescent, and Flash. Auto WB generally performs well, but manual selection provides greater accuracy. Custom WB allows you to set a precise balance using a white or gray card. Experiment with settings to achieve the most realistic and pleasing colors in your photos.
Zoom and Focus
Achieving sharp, well-composed images relies on mastering zoom and focus. The Coolpix features an optical zoom lens, providing magnification without significant image degradation. Use the zoom control (typically a lever or buttons) to frame your subject. Understanding focus modes is crucial for capturing clear photos.
Your camera offers autofocus (AF) options like Single AF (for stationary subjects) and Continuous AF (for moving subjects). Manual focus (MF) grants complete control, ideal for precise adjustments or challenging lighting. Practice switching between AF modes to optimize performance for diverse shooting scenarios.
Using the Zoom Lens
The Nikon Coolpix zoom lens allows you to get closer to your subject without physically moving. Typically controlled by a lever surrounding the shutter button, zooming is intuitive. Gently push the lever towards ‘W’ (wide-angle) for broader scenes and ‘T’ (telephoto) for distant subjects.
Digital zoom is also available, but it utilizes software to enlarge the image, potentially reducing quality. Prioritize optical zoom for the best results. Be mindful of camera shake when zoomed in; a tripod or steady grip is recommended for sharper images at longer focal lengths.
Autofocus Modes: Selecting the Right Focus Method
Your Nikon Coolpix offers several autofocus (AF) modes to suit different shooting scenarios. Single AF is ideal for stationary subjects – the camera focuses once when you half-press the shutter. Continuous AF tracks moving subjects, constantly adjusting focus. Auto-area AF lets the camera automatically select focus points, while center-point AF focuses solely on the center of the frame.
Face-priority AF is excellent for portraits, detecting and focusing on faces. Experiment with these modes to determine which best suits your subject and desired outcome for consistently sharp images.
Manual Focus: Taking Control of Sharpness
For precise control over focus, your Nikon Coolpix allows manual focusing. Switch to Manual Focus (MF) mode via the camera’s menu. Use the directional pad or control dial to adjust the focus until your subject appears sharp on the LCD screen. Zooming in on the display during MF helps achieve critical sharpness.
MF is particularly useful in low light or when shooting through obstacles where autofocus may struggle. Remember that slight movements can affect focus, so steady hands are crucial for optimal results when using manual focus.
Video Recording
Your Nikon Coolpix excels at capturing moving moments! To start recording, switch to Video Mode using the mode dial. Press the record button – a red square – to begin and press it again to stop. The LCD displays recording time remaining.
Explore various video settings within the camera menu. Adjust resolution (e.g., 1080p, 4K) and frame rate (e.g., 30fps, 60fps) for desired quality and smoothness. Ensure sufficient storage space on your memory card for longer recordings. Experiment with different settings to achieve professional-looking videos!
Starting and Stopping Video Recording
Initiating video capture is simple! First, rotate the mode dial on top of your Coolpix to the video camera icon. The camera will prepare for recording, displaying the live view on the LCD screen. Press the large, red record button located on the top panel to begin filming. A recording indicator will appear on the screen.
To halt recording, press the red record button once more. The camera will save the video file to your memory card. Be mindful of the remaining battery life and available storage space, indicated on the LCD. Preview your footage immediately in playback mode!
Video Resolution and Frame Rate Options
Customize your video quality! Access the video settings through the camera’s menu. You can select from various resolutions, including 1080p Full HD, 720p HD, and sometimes even 4K (depending on your Coolpix model). Higher resolutions offer greater detail but require more storage space.
Frame rate determines the smoothness of motion. Common options are 30fps (frames per second) for a natural look and 60fps for smoother action. Choose settings based on your intended use – 30fps is ideal for general viewing, while 60fps suits fast-paced subjects.
Using the Microphone for Better Audio
Enhance your videos with clear sound! The Nikon Coolpix features a built-in microphone for recording audio alongside your videos. To optimize audio quality, minimize background noise during recording. Avoid windy conditions or areas with excessive ambient sounds.
External microphone options may be available for certain Coolpix models, offering professional-grade audio capture. Check your camera’s specifications. Adjust the microphone level in the camera settings to prevent distortion or overly quiet recordings. Proper audio significantly improves the overall viewing experience.
Reviewing and Deleting Photos & Videos
Easily manage your captured memories! After shooting, use Playback Mode to review your photos and videos on the Coolpix’s LCD screen. Navigate through your images using the directional buttons. Zoom in to check details and ensure sharpness. To delete unwanted files, select the item and choose the delete option from the menu.
Be cautious when deleting! Deleted files are often moved to a recycle bin (if available) before permanent removal. Remember to empty the recycle bin to free up storage space. Utilize the protect function to safeguard important images from accidental deletion.
Playback Mode: Viewing Your Images
Accessing your photos is simple! To enter Playback Mode, press the dedicated playback button (usually indicated by a triangle symbol). This allows you to browse through your stored photos and videos directly on the camera’s LCD screen. Use the zoom control to magnify images for detailed inspection, checking focus and composition.
Navigation is key. Utilize the directional pad to scroll through your images. The display often provides shooting information like date, time, and camera settings. Some Coolpix models offer slideshow functionality for convenient viewing. Rotate images if needed for optimal presentation.
Deleting Unwanted Files
Free up space on your memory card! Within Playback Mode, select the image or video you wish to remove. Typically, you’ll need to press a ‘Delete’ button or navigate a menu option to initiate the deletion process. Be cautious! A confirmation screen will appear – carefully review before confirming, as deleted files are often unrecoverable.
Deleting multiple files is possible. Many Coolpix cameras allow you to select multiple files for batch deletion. Look for a multi-select option within the playback menu. Remember to regularly delete unwanted content to ensure sufficient storage for new photos and videos.
Protecting Images from Accidental Deletion
Safeguard your cherished memories! The Nikon Coolpix offers a protection feature to prevent accidental deletion of important photos and videos. In Playback Mode, select the desired file(s) and access the menu options. Look for a ‘Protect’ or ‘Lock’ function – enabling this will prevent the file from being deleted or overwritten.
Protected files are usually marked with a key icon. To unprotect, simply repeat the process and disable the protection feature. This is especially useful for photos you intend to keep long-term or those you’ve carefully edited; Remember to regularly check protection status!
Connecting to a Computer
Transferring your photos and videos is easy! Your Nikon Coolpix can connect to a computer for seamless file transfer. The primary method is using a USB cable, included in the box. Connect the camera to a USB port on your computer; the camera will likely appear as a removable drive.
Alternatively, some Coolpix models offer wireless transfer. Check your specific model’s features for compatibility with Wi-Fi or Bluetooth. Once connected, you can easily copy files to your computer’s hard drive for editing, sharing, or backup purposes. Ensure proper drivers are installed if prompted.
Using a USB Cable
For a direct connection, use the provided USB cable. Locate the USB port on your Nikon Coolpix – it’s usually covered by a protective flap. Connect the other end to a USB port on your computer. Your camera may power on automatically or require you to turn it on.
Once connected, your computer should recognize the camera as a removable storage device. You may be prompted to select a connection mode (like MTP or PTP); MTP is generally recommended for transferring larger files. Browse the camera’s folders to locate your photos and videos, then simply copy and paste them to your desired location on your computer.
Wireless Transfer Options (if applicable)
Many Coolpix models offer Wi-Fi and/or Bluetooth connectivity. To utilize these, first ensure your camera is within range of your wireless network and that Wi-Fi is enabled in the camera’s settings. You may need to enter your network password.
Next, download the Nikon SnapBridge app to your smartphone or tablet. Follow the in-app instructions to pair your camera with your device. Once paired, you can automatically transfer photos to your phone for easy sharing, or remotely control the camera from your device. Bluetooth offers a lower-power connection for continuous transfer.

Importing Photos and Videos
Once connected via USB, your computer should recognize the Coolpix as a removable drive. Open the drive to access the DCIM folder, which contains your photos and videos. You can then copy and paste these files to your desired location on your computer.
Alternatively, utilize Nikon’s Transfer 2 software (available for download on Nikon’s website) for a more streamlined import process. This software allows for automatic organization, renaming, and even basic editing. Ensure the software is up-to-date for optimal compatibility and features. Regularly back up your imported media to prevent data loss!