
Oster Toaster Oven Instruction Manual: A Comprehensive Guide
Welcome! This manual provides detailed guidance for your Oster toaster oven, ensuring optimal performance and longevity. Explore features, safety, and troubleshooting tips for delightful cooking!
Understanding Your Oster Toaster Oven
Congratulations on selecting an Oster toaster oven! This versatile appliance combines the functionality of a traditional oven with the speed and convenience of a toaster. Oster, a trusted brand for over a century, delivers reliable performance in the kitchen.
This guide will walk you through everything you need to know, from identifying your specific model and understanding its components, to mastering various cooking techniques. Whether you’re toasting bread, baking a pizza, or broiling a steak, your Oster toaster oven is designed to deliver consistently delicious results. Familiarize yourself with the control panel and heating elements to unlock its full potential. Remember to always refer to the safety precautions outlined in this manual for a safe and enjoyable cooking experience.
Model and Date Code Identification
Locating essential information about your Oster toaster oven is crucial for support, warranty claims, and finding compatible parts. The model number, a unique identifier for your specific appliance, is typically found on a label, plate, or engraved marking on the bottom or back of the unit.
Alongside the model number, you’ll find a date code. This code indicates when your oven was manufactured. It’s usually stamped on the metal prong of the electrical cord or directly on the bottom of the appliance. The date code format consists of a single letter followed by three numbers (e.g., P293). Having both the model and date code readily available streamlines any service inquiries or part replacements.
Locating the Model Number
Finding your Oster toaster oven’s model number is a simple process, vital for accessing support resources and replacement parts. Begin by carefully inspecting the underside of the appliance. Look for a dedicated label or plate securely attached. The model number will be clearly printed on this label, often preceded by the word “Model” or “Model No.”
If you don’t find a label underneath, check the back of the unit. In some models, the model number is directly engraved into the appliance casing. Ensure good lighting to easily read the inscription. Recording this number ensures efficient assistance when contacting Oster customer service or ordering specific components for your toaster oven.
Decoding the Date Code (Letter & Three Numbers)
Understanding your Oster toaster oven’s date code helps determine its manufacturing date. This code is typically found stamped on the metal prong of the power cord or on the appliance’s underside. The date code consists of a single letter followed by three numerical digits – for example, “P293”.
The letter represents the manufacturing year, while the three numbers indicate the week of the year the unit was produced. Refer to Oster’s official documentation or contact customer support to decipher the specific year associated with each letter. Knowing the date code can be useful for warranty claims and assessing the appliance’s age.

Key Features and Components
Explore the design! This section details the exterior and interior parts, including the control panel and heating elements, for a better understanding.
Exterior Components Overview
The exterior of your Oster toaster oven is designed for both functionality and ease of use. You’ll notice a sleek, durable housing that protects the internal components. Key features include the control panel, which houses the various function selectors and temperature controls. The oven door features a heat-resistant glass window, allowing you to monitor your cooking progress without opening it and losing heat.
Handles are strategically placed for safe and convenient opening and closing of the door. Look for the model and date code label, typically located on the bottom or back of the unit – crucial for warranty and support. The exterior also includes ventilation openings, essential for proper airflow during operation. Finally, a crumb tray is usually accessible from the front or bottom, designed to catch any fallen food particles for easy cleanup.
Interior Components Overview
Stepping inside your Oster toaster oven reveals a carefully designed cooking space. You’ll immediately notice the heating elements – typically one at the top and one at the bottom – responsible for generating the heat for toasting, baking, and broiling. A removable baking pan is included for versatile cooking, allowing you to bake cookies, casseroles, and more.
The oven rack provides adjustable positioning for different food sizes and cooking needs. The interior walls are often coated with a non-stick material for easier cleaning. Don’t forget the crumb tray located at the bottom, which slides out to collect any fallen debris. Proper placement of these components is vital for even cooking and optimal performance. Always ensure they are securely positioned before operation.
Control Panel Explained
The control panel is your command center for operating the Oster toaster oven. Typically, you’ll find a function selector dial allowing you to choose between toast, bake, broil, and sometimes warm settings. Temperature control is usually managed by a separate dial, offering precise heat adjustments for various recipes. A timer dial lets you set the desired cooking duration, automatically shutting off the oven when complete.
Some models feature digital controls with preset functions and a clear display. Look for indicators for power, heating, and timer status. Understanding each control’s function is crucial for achieving optimal cooking results. Refer to the diagrams within this manual for specific button and dial locations on your model.
Heating Elements – Top and Bottom
Your Oster toaster oven utilizes both top and bottom heating elements to ensure even cooking and browning. The bottom element primarily handles baking and toasting, providing consistent heat to the food. The top element is crucial for broiling, delivering intense, direct heat for searing and browning the upper surface of dishes.
These elements work independently or in combination, depending on the selected function. During toasting, both elements may operate to achieve golden-brown results. When broiling, only the top element activates. Regular cleaning of these elements is vital for maintaining optimal performance and preventing smoke or odors.

Operating Instructions
Get started with ease! This section details initial setup, toasting, baking, and broiling procedures for your Oster toaster oven, ensuring delicious results every time.
Initial Setup and First Use
Before your first culinary adventure, carefully unpack your new Oster toaster oven and remove all packaging materials. Inspect the unit for any visible damage. Place the oven on a stable, heat-resistant surface with adequate ventilation.
Prior to first use, it’s recommended to run the oven empty for approximately 15-20 minutes at the highest temperature setting (typically bake or broil). This process burns off any residual manufacturing oils or odors. A slight smell during this initial burn-off is normal.
Ensure the crumb tray is properly inserted before operation. Familiarize yourself with the control panel and its various functions. Always test with a simple recipe, like toasting bread, to confirm proper functionality before attempting more complex dishes. Enjoy your new Oster appliance!
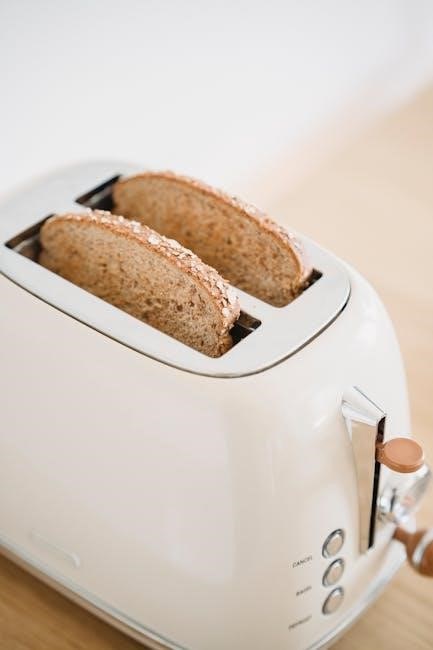
Toasting Bread – Settings and Tips
Achieving perfectly toasted bread is simple with your Oster toaster oven! Begin by selecting your desired toast shade using the control panel – options typically range from light to dark. Insert bread slices, ensuring they aren’t overlapping.
For even toasting, use bread slices of uniform thickness. Monitor the toasting process, as ovens vary. If one side toasts faster, rotate the bread halfway through the cycle.
Experiment with settings to find your preferred level of browning. For frozen bread, use the ‘frozen’ setting if available, or slightly increase the toasting time. Remember, smaller bread types may toast quicker. Enjoy your golden-brown toast!
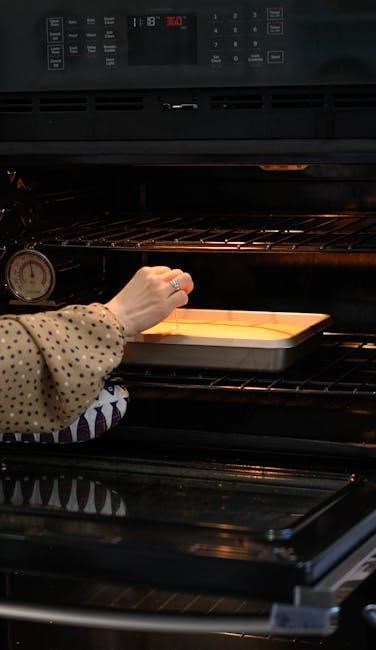
Baking – Temperature and Time Guidelines
Your Oster toaster oven is surprisingly versatile for baking! Preheat the oven for 5-10 minutes before placing food inside. Generally, reduce recipe temperatures by 25°F (15°C) compared to a conventional oven.
For cookies, bake at 325°F (160°C) for 12-15 minutes. Cakes typically require 350°F (175°C) for 20-25 minutes. Smaller items bake faster, so check for doneness frequently.
Use oven-safe bakeware that fits comfortably inside without touching the heating elements. Monitor baking progress and adjust time as needed. Remember, baking times are estimates and may vary based on your specific model and recipe.
Broiling – Achieving Perfect Results
Broiling in your Oster toaster oven delivers quick, intense heat for browning and crisping. Always use the broiler pan included with your oven, positioned 4-6 inches from the top heating element. Preheat the broiler for several minutes before adding food.
For best results, marinate meats beforehand. Place food on the broiler rack within the pan. Broil for 3-5 minutes per side, flipping halfway through. Watch carefully to prevent burning, as broiling happens rapidly!
Remember to leave the oven door slightly ajar during broiling to allow heat to escape and prevent overheating. Broiling is ideal for steaks, chicken, and vegetables.

Safety Precautions
Prioritize safety! Always unplug the oven when cleaning, avoid water near electrical parts, and ensure proper ventilation to prevent fire hazards during operation.
General Safety Warnings
Read all instructions carefully before operating your Oster toaster oven. This appliance is intended for household use only. Never operate the oven if the power cord or plug is damaged. Do not immerse the appliance in water or any other liquid.
Supervise children closely when the oven is in use or cooling down, as surfaces become hot. Avoid touching hot surfaces; use oven mitts or handles. Do not operate the oven near flammable materials. Always place the oven on a stable, heat-resistant surface.
Never leave the oven unattended during operation. Unplug the oven from the outlet when not in use and before cleaning. Do not use accessories not recommended by Oster. Improper use can cause injury or damage to the appliance.
Electrical Safety Guidelines
To prevent electrical shock, never operate the Oster toaster oven with a damaged cord or plug. If the appliance malfunctions, disconnect it immediately and contact customer support. Do not attempt to repair it yourself. Ensure the voltage of your outlet matches the appliance’s rating;
Avoid using extension cords whenever possible. If one is necessary, ensure it’s appropriately rated for the oven’s wattage. Never run the power cord under carpeting or near heat sources. Always unplug the oven before cleaning or performing maintenance.
Grounding is essential for safety. Do not modify the plug in any way. If you are unsure about electrical safety, consult a qualified electrician. Improper grounding can lead to a risk of electric shock or fire.
Proper Ventilation Requirements
Adequate ventilation is crucial when operating your Oster toaster oven. Ensure sufficient space around the appliance – at least 6 inches on all sides – to allow for proper airflow. Do not block the vents located on the back or sides of the oven.
Avoid placing the oven directly against walls or under cabinets, as this can restrict airflow and cause overheating. Operating the oven in a confined space may lead to reduced performance and potential fire hazard. Ensure the area is well-ventilated during use.
Never operate the oven in a damp or humid environment. Proper ventilation helps dissipate heat and prevents moisture buildup, ensuring safe and efficient operation. Regularly check the vents for obstructions.

Maintenance and Cleaning
Regular cleaning extends your Oster toaster oven’s life and ensures optimal performance. Always unplug and cool before cleaning interior and exterior surfaces thoroughly.
Cleaning the Interior
To clean the interior of your Oster toaster oven, always begin by ensuring the unit is completely unplugged and cooled down. Remove any loose crumbs or food particles using a soft brush or cloth. For stubborn residue, create a paste of baking soda and water, gently applying it to the affected areas.
Avoid abrasive cleaners or scouring pads, as these can damage the interior coating. Wipe down the interior surfaces with a damp cloth, ensuring no baking soda residue remains. Pay close attention to the heating elements, cleaning around them carefully. The interior should be dried thoroughly before using the oven again. Regular interior cleaning prevents buildup and maintains optimal cooking performance.
Cleaning the Exterior
Maintaining the exterior of your Oster toaster oven is simple. Always unplug the unit and allow it to cool completely before cleaning. Wipe down the exterior surfaces with a damp cloth and mild dish soap. Avoid using abrasive cleaners, as they can scratch or discolor the finish.
For stainless steel exteriors, use a stainless steel cleaner to prevent streaks and maintain shine. Pay attention to the control panel, ensuring no liquid enters the buttons or display. Dry the exterior thoroughly with a clean cloth after cleaning. Regular exterior cleaning keeps your Oster toaster oven looking its best and prevents grime buildup.
Replacing the Crumb Tray
Regularly emptying the crumb tray is crucial for maintaining your Oster toaster oven’s performance and preventing potential fire hazards. Always ensure the oven is unplugged and completely cool before accessing the crumb tray. Gently slide the tray out from the bottom of the oven – it’s usually located at the front.
Dispose of the crumbs and wipe the tray clean with a damp cloth. Ensure the tray is completely dry before sliding it back into its designated slot. A clean crumb tray promotes even heating and prevents unpleasant odors. Replace the tray fully to ensure proper function.
Troubleshooting Common Issues
Encountering problems? This section offers solutions for typical issues like heating failures, uneven toasting, and deciphering error codes for your Oster oven.
Oven Not Heating
Problem: Your Oster toaster oven isn’t heating up, preventing cooking or toasting. First, verify the power cord is securely plugged into a functioning outlet. Test the outlet with another appliance to confirm it’s receiving power.
Check the control panel: Ensure the oven is set to a cooking function (Toast, Bake, Broil) and that a timer has been activated. Sometimes, a simple reset is all that’s needed – unplug the oven for a few minutes, then plug it back in.
Inspect the heating elements: Carefully (with the oven unplugged!) visually check the top and bottom heating elements for any breaks or damage. If elements appear damaged, do not attempt to repair them yourself; contact Oster support for assistance. A faulty thermostat or heating element may require professional repair or replacement.

Safety First: Never operate the oven if you suspect an electrical issue.
Uneven Toasting
Issue: Experiencing toast that’s darker on one side than the other? Several factors can contribute to uneven toasting with your Oster oven. Ensure the bread slices are positioned evenly on the rack, avoiding overlap. Rotate the bread halfway through the toasting cycle for more consistent results.
Check the heating elements: Visually inspect (with the oven unplugged!) if one heating element appears weaker or damaged compared to the other. Uneven element performance leads to inconsistent toasting.
Consider bread type: Different bread thicknesses and densities toast at varying rates. Adjust the darkness setting accordingly. Regularly cleaning the crumb tray prevents burnt particles from affecting toasting consistency. If the problem persists, contact Oster customer support.
Pro-Tip: For best results, use bread slices of uniform thickness.
Error Codes and Their Meanings
Error codes on your Oster toaster oven indicate specific issues requiring attention. While models vary, common codes include “E1” or “Err1”, often signaling a temperature sensor malfunction – discontinue use and contact support. “E2” or “Err2” may point to a heating element failure, also requiring professional assistance.
If the display shows “E3” or “Err3”, it could indicate an issue with the control panel or internal circuitry. Always unplug the oven before attempting any troubleshooting. Refer to the complete error code list in your specific model’s manual.

Warranty Information & Support
Oster provides a warranty covering defects in materials and workmanship. Register your product and access FAQs, manuals, and replacement parts online for support!
Oster Warranty Details
Oster stands behind the quality of its appliances with a limited warranty, offering peace of mind to consumers. The standard warranty period for Oster toaster ovens is typically one year from the date of original purchase. This warranty covers defects in materials and workmanship under normal household use.
Should your toaster oven malfunction during the warranty period, Oster will, at its discretion, repair or replace the defective appliance free of charge. The warranty does not cover damage resulting from misuse, accidents, unauthorized repairs, or normal wear and tear. Proof of purchase is required to claim warranty service.
For complete warranty details, including exclusions and limitations, please refer to the official Oster warranty statement included with your product or visit the Oster website. Retaining your purchase receipt is crucial for a smooth warranty claim process.
Product Registration
Registering your Oster toaster oven offers several benefits, enhancing your ownership experience and ensuring access to important updates. Product registration allows Oster to keep you informed about product safety notifications, new features, and exclusive promotions tailored to your appliance.
Registration is quick and easy! You can register your toaster oven online through the official Oster website, typically found within the “Support” or “Customer Care” section. You’ll need your model number and date of purchase readily available. Alternatively, some products include a registration card in the packaging.
By registering, you streamline potential warranty claims and demonstrate proof of ownership. Don’t delay – register today to maximize your Oster appliance’s benefits!
Finding Replacement Parts
Need a replacement part for your Oster toaster oven? Oster provides resources to easily locate and purchase components to keep your appliance running smoothly. The official Oster website features a dedicated section for appliance parts, allowing you to search by model number. This ensures compatibility and a proper fit.
You’ll typically find parts like heating elements, crumb trays, racks, and control knobs available for purchase. Several authorized online retailers also carry genuine Oster replacement parts. When ordering, always double-check the model number to guarantee the correct part.
Don’t attempt to use non-genuine parts, as they may compromise safety and performance. Prioritize authentic Oster components for lasting reliability!