
KT Tape, an elastic therapeutic tool, offers support and pain relief for various knee issues. This guide provides instructions for effective application, aiding athletes and those seeking comfort.
Kinesiology tape manages pain, reduces swelling, and supports muscles and joints, proving beneficial for knee stability and a range of conditions.
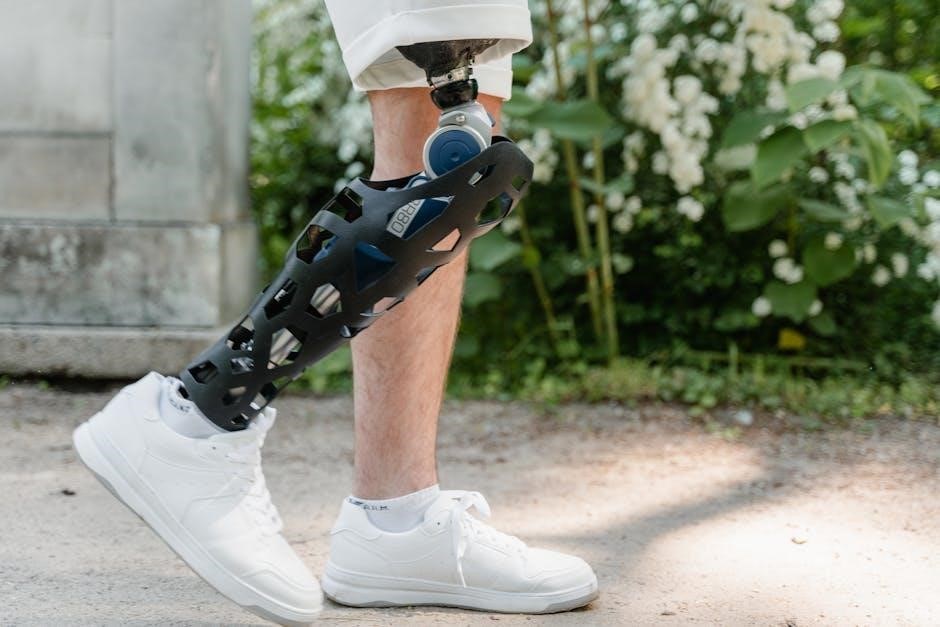
Don’t hesitate to try taping yourself; it typically takes a few attempts to become comfortable with the process and achieve professional-level results.
What is KT Tape?
KT Tape, short for Kinesiology Therapeutic Tape, is a thin, elastic cotton strip with an acrylic adhesive that’s designed to mimic the elasticity of human skin. Unlike traditional athletic tape, KT Tape doesn’t restrict movement; instead, it supports muscles and joints while allowing a full range of motion.
This unique quality makes it ideal for addressing knee pain and instability. It’s crafted to be breathable, lightweight, and water-resistant, allowing users to wear it during various activities, including sports and daily routines. The tape’s elasticity gently lifts the skin, creating microscopic spaces that promote blood flow and lymphatic drainage, ultimately aiding in pain reduction and faster recovery.
KT Tape isn’t a cure, but a tool to help the body’s natural healing processes.
Benefits of KT Taping for Knee Issues
KT Taping offers a multitude of benefits for individuals experiencing knee discomfort. Primarily, it helps to reduce pain and swelling by promoting lymphatic drainage and increasing blood flow to the affected area. This enhanced circulation aids in the healing process and minimizes inflammation.
Furthermore, KT Tape provides support to the knee joint without limiting range of motion, allowing athletes and active individuals to continue their activities with greater confidence. It can also improve proprioception – the body’s awareness of its position in space – which enhances stability and reduces the risk of re-injury.
By facilitating muscle function, KT Tape can contribute to improved performance and faster recovery times.
When to Use KT Tape for the Knee
KT Tape is versatile and can be utilized in various scenarios involving knee issues. It’s beneficial for managing pain associated with conditions like patellar tendonitis, commonly known as jumper’s knee, characterized by a dull ache under the knee cap.
Individuals experiencing runner’s knee (patellofemoral pain syndrome) can also find relief through KT application. Post-injury support for ACL or MCL sprains is possible, but always under the guidance of a healthcare professional.
Consider using KT Tape before, during, or after physical activity to provide support, reduce pain, and promote healing. It’s a valuable tool for athletes, active individuals, and those recovering from knee injuries.

Preparation for KT Tape Application
Proper KT Tape application begins with thorough skin and tape preparation; Cleaning the skin and rounding the tape corners maximizes adhesion and comfort for optimal results.
Skin Preparation
Effective KT Tape application hinges on proper skin preparation. Begin by ensuring the skin around your knee is clean, dry, and free from oils, lotions, or sweat. These substances can significantly hinder the tape’s adhesive properties, leading to poor support and premature peeling.
Gently wash the area with mild soap and water, then thoroughly dry it with a clean towel. For individuals with particularly oily skin, an alcohol wipe can be used cautiously to remove any remaining residue, but avoid excessive use as it can cause dryness.
Shaving the area where the tape will be applied is also recommended, especially for those with significant hair growth, to ensure optimal contact and adhesion. Remember, well-prepared skin is crucial for maximizing the benefits of KT Tape.
Tape Preparation (Cutting & Rounding Corners)
Preparing your KT Tape correctly enhances its application and longevity; Begin by cutting the tape to the desired length, considering the specific taping technique you’ll be using. It’s always better to start with a slightly longer piece, as you can trim excess later.
Crucially, round the corners of the tape strips. Sharp corners lift easily, creating friction and causing the tape to peel prematurely. Rounding the corners minimizes this risk, allowing the tape to conform smoothly to the knee’s contours and maintain better adhesion.
Use clean scissors to achieve rounded edges. This simple step significantly improves the tape’s performance and ensures a more comfortable, secure fit throughout your activity.
Understanding Tape Direction & Stretch
Proper tape direction and stretch are vital for effective KT taping. Generally, apply tape along the muscle fibers or in the direction of joint movement, depending on the desired effect – support, pain relief, or improved function.
Stretch is categorized into three levels: no stretch (for lymphatic drainage), mild stretch (25-50% – for pain relief), and full stretch (75-100% – for muscle support). Applying the correct stretch is crucial for achieving the intended outcome.
Avoid overstretching, as it can irritate the skin and reduce the tape’s effectiveness. Understanding these principles ensures optimal support and comfort for your knee.
Basic KT Taping Techniques for Knee Pain
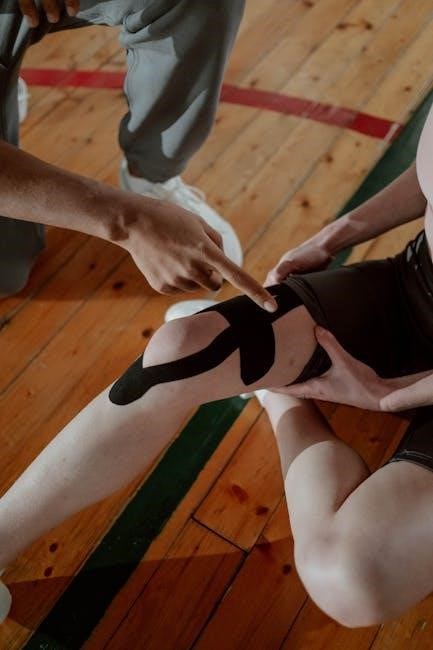
Basic techniques like I-Strip, Y-Strip, and X-Strip applications provide foundational support for common knee pain. These methods offer stability and pain management.
Mastering these core techniques is essential before exploring more advanced taping methods for specific knee conditions.
I-Strip Application for General Knee Support
The I-Strip technique is a fundamental method for providing overall knee support. Begin by tearing a strip of KT Tape, approximately 8-10 inches long. Round the corners to prevent premature peeling. Position the knee in a slightly bent position.
Anchor the tape approximately 2-3 inches above the knee cap, without any stretch. Apply moderate (50-75%) stretch as you guide the tape down the side of the knee, over the patella, and continue down the other side. Anchor the end 2-3 inches below the knee, again without stretch.
Rub the tape firmly to activate the adhesive. This application provides gentle support and can help reduce swelling and discomfort during daily activities or light exercise.
Y-Strip Application for Patellar Tracking
The Y-Strip technique aims to improve patellar tracking, addressing issues where the knee cap doesn’t move smoothly. Start by measuring from the inner knee to the outer knee, across the patella. Cut a “Y” shaped strip of KT Tape, ensuring the tails are long enough to anchor comfortably.
Tear the backing off the base of the “Y” and apply it without stretch directly over the patella. Then, apply moderate (50-75%) stretch to each tail, pulling them diagonally outwards and anchoring them on either side of the knee.
Rub the tape to activate the adhesive. This application gently guides the patella, promoting proper movement and reducing pain associated with tracking issues.
X-Strip Application for Ligament Support
The X-Strip technique provides support to ligaments around the knee, offering stability during activity; Begin by measuring the length from the inside of the knee to the outside, across the joint line. Cut two strips of KT Tape of this length.
Apply the first strip with 25-50% stretch, starting on the inner side of the knee and crossing diagonally to the outer side. Repeat with the second strip, crossing in the opposite direction to form an “X”.
Ensure both anchors are secure and rub the tape to activate the adhesive. This method helps limit excessive joint movement and provides proprioceptive feedback, aiding ligament recovery.
Specific KT Tape Applications
KT Tape offers targeted support for various knee pain sources, including medial, lateral, patellar tendonitis, and runner’s knee, even ACL/MCL injuries—with guidance.
KT Tape for Medial Knee Pain
Medial knee pain, often stemming from issues with the MCL or meniscus, requires specific KT Tape application. Begin by applying an I-strip with a 10-20% stretch to the medial aspect of the knee, anchoring above the joint line and extending down towards the medial ankle.
This provides support and helps offload stress from the affected structures. A second strip can be applied parallel to the first, slightly overlapping, to enhance stability. Ensure the tape is applied with the knee slightly bent to engage the muscle properly.
Focus on creating gentle skin lift to promote lymphatic drainage and reduce swelling. Avoid excessive tension, as this can restrict movement. Remember to round the corners of the tape to prevent premature peeling.
KT Tape for Lateral Knee Pain
Addressing lateral knee pain, often linked to the LCL or IT band, necessitates a targeted KT Tape approach. Initiate with an I-strip, applying a 10-20% stretch along the lateral side of the knee, anchoring above the joint line and extending towards the lateral ankle.
This application aims to provide support and alleviate stress on the lateral structures. Consider a second strip, parallel to the first, with slight overlap for increased stability. Maintain a gentle knee bend during application to optimize muscle engagement.
Prioritize a subtle skin lift to encourage lymphatic flow and minimize swelling. Avoid over-tensioning, which could impede movement. Rounding the tape’s corners is crucial for preventing early detachment.
KT Tape for Patellar Tendonitis
Patellar tendonitis, characterized by pain below the kneecap, benefits from KT Tape’s supportive and pain-reducing properties. Begin with an I-strip, applying minimal stretch (10-15%) at the origin, increasing to 20-25% as you approach the tibial tuberosity.
This technique aims to offload stress from the inflamed tendon. Ensure the knee is slightly bent during application to engage the patellar tendon effectively. A second strip can be applied parallel, providing additional support and proprioceptive feedback.
Focus on creating a gentle lift to improve blood flow and reduce inflammation. Round the tape corners to prevent peeling. Remember, KT Tape complements, but doesn’t replace, proper rehabilitation.
KT Tape for Runner’s Knee (Patellofemoral Pain Syndrome)
Runner’s knee, or patellofemoral pain syndrome, often stems from improper patellar tracking. Utilize a Y-strip application to address this. Begin with the base of the ‘Y’ over the vastus medialis obliquus (VMO), with no stretch.
Apply the tails around the patella, using 25-50% stretch, ensuring a gentle pull towards the outside. This encourages proper patellar alignment during activity. A second Y-strip can be applied for enhanced support, mirroring the first.
Focus on creating a lifting effect to alleviate pressure on the patellofemoral joint. Round tape corners to prevent lifting. Combine KT Tape with strengthening exercises for optimal results and long-term relief.
KT Tape for ACL/MCL Support (Post-Injury ⸺ with professional guidance)
Crucially, KT Tape for ACL/MCL injuries should always be applied under the guidance of a healthcare professional. It’s a supportive measure, not a replacement for medical treatment. An I-strip application, with moderate stretch, can be used along the medial or lateral aspect of the knee.
Anchor the tape slightly above the joint line and extend it down, providing support to the ligament. A second strip can be applied in a similar fashion, creating an ‘X’ for increased stability.
Focus on providing proprioceptive feedback and reducing swelling. Remember, KT Tape is an adjunct to rehabilitation, not a cure. Follow your therapist’s instructions carefully.
Advanced KT Tape Techniques
Explore space correction, decompression, and muscle facilitation techniques for enhanced KT Tape application. These methods address specific biomechanical issues for optimal knee support.
Space Correction Technique
The Space Correction Technique with KT Tape aims to improve the space between the skin and underlying tissues, often used to address swelling or restrictions. This technique involves applying the tape with a gentle stretch, creating lift. Begin by anchoring the tape without stretch, then apply the body of the tape with 50-75% stretch, depending on the individual’s sensitivity and the severity of the condition.
Focus on applying the tape in the direction of lymphatic flow to encourage fluid drainage and reduce swelling around the knee. This technique is particularly useful for addressing localized areas of discomfort or tightness. Remember to round the corners of the tape to prevent premature lifting and ensure a comfortable, secure application. Proper assessment is crucial before applying this technique.
Decompression Technique
The Decompression Technique utilizes KT Tape to create space between tissues, reducing pressure and alleviating pain around the knee joint. This is achieved by applying the tape with a moderate stretch – typically 50-75% – in a specific pattern. Begin with an anchor without stretch, then apply the tape body with the intended stretch, focusing on lifting the skin.
This lift creates a decompression effect, improving circulation and reducing inflammation. It’s particularly effective for conditions causing localized pain or restricted movement. Ensure the tape is applied in the direction of tissue movement, and always round the corners to prevent peeling. Careful assessment of the knee is vital before application.
Muscle Facilitation Technique
The Muscle Facilitation Technique with KT Tape aims to enhance muscle function around the knee, supporting movement and reducing fatigue. This involves applying tape with a gentle to moderate stretch – usually 25-50% – along the muscle fibers, originating at the muscle’s attachment point and extending towards its belly.
This technique doesn’t aim to restrict movement but rather to stimulate muscle activation and improve proprioception. It’s beneficial for muscles weakened by injury or overuse. Proper application follows the muscle’s natural direction, and rounding tape corners is crucial. Assess muscle function before and after application to gauge effectiveness.
Important Considerations & Precautions
Always consider timing – tape before activity for support, or after for decompression. Monitor for skin reactions, and discontinue use if irritation occurs. Professional guidance is key!
Tape Application Timing (Before vs. After Activity)
Timing your KT Tape application is crucial for maximizing its benefits. Applying tape before physical activity primarily focuses on providing dynamic support to muscles and joints. This proactive approach helps stabilize the knee, enhance proprioception (body awareness), and potentially prevent injuries during movement. Ensure the tape is applied with the appropriate stretch to facilitate muscle activation.
Conversely, applying KT Tape after activity, particularly following exertion or injury, centers on reducing pain and swelling. In this scenario, the tape is typically applied with minimal stretch to create space between the skin and underlying tissues, promoting lymphatic drainage and reducing inflammation. This decompression technique can aid in recovery and alleviate discomfort. Consider your specific needs and goals when deciding whether to tape before or after activity.
Tape Wear Duration
KT Tape can generally be worn for 1-5 days, depending on activity level and skin sensitivity. For most individuals engaging in moderate activity, 3-5 days is a common timeframe. However, those participating in intense workouts or water sports may find the adhesive wears out sooner, requiring reapplication every 1-3 days.
Monitor the tape for lifting at the edges, indicating it’s losing adhesion. It’s best to remove and replace the tape before it begins to peel off completely. Showering, swimming, and excessive sweating can also reduce tape longevity. Listen to your body; if you experience skin irritation, remove the tape immediately.
Skin Reactions & Allergies
While KT Tape is generally safe, some individuals may experience skin reactions. Mild redness or itching is common and usually subsides quickly. However, if a rash develops, or itching becomes severe, remove the tape immediately; True allergic reactions to the adhesive are rare, but possible.
Before full application, perform a patch test on a small area of skin to check for sensitivity. Ensure the skin is clean and dry before applying the tape. If you have sensitive skin or known allergies to adhesives, consider using pre-cut strips with hypoallergenic adhesive. Discontinue use and consult a healthcare professional if irritation persists.

Complementary Treatments
Enhance KT Tape’s benefits with rest, elevation to reduce swelling, and ice therapy for 15-20 minutes to alleviate pain and inflammation effectively.
Combining these methods with KT taping and physical therapy optimizes recovery and supports overall knee health for lasting results.
Rest and Elevation
Rest is paramount in the initial stages of knee injury or pain. Avoiding activities that aggravate your condition allows the tissues to begin the healing process without further strain. This doesn’t necessarily mean complete immobilization, but rather modifying your activity level to avoid discomfort.
Elevation plays a crucial role in reducing swelling. By raising your knee above your heart, you facilitate venous return, helping to drain excess fluid from the injured area. This is particularly beneficial after physical activity or when experiencing noticeable inflammation.
Combine rest and elevation with KT taping for synergistic effects, maximizing pain relief and promoting faster recovery. Consistent application of these principles supports optimal healing and a return to activity.
Ice Therapy
Ice therapy is a cornerstone of knee pain management, effectively reducing inflammation and numbing discomfort. Applying ice constricts blood vessels, minimizing swelling and tissue damage, particularly after activity or acute injury. It’s a simple yet powerful tool for accelerating recovery.
For optimal results, apply an ice pack or cold compress to the affected area for 15-20 minutes at a time, several times a day. Always use a barrier, like a towel, between the ice and your skin to prevent frostbite.
Combine ice therapy with KT taping to enhance its benefits. The tape provides support while the ice reduces inflammation, creating a comprehensive approach to knee rehabilitation and pain relief.
Physical Therapy & Rehabilitation
Physical therapy and a structured rehabilitation program are crucial for long-term knee health and recovery. While KT Tape offers support and pain relief, it’s not a substitute for addressing the underlying cause of your knee issues.
A qualified physical therapist can design a personalized exercise plan to strengthen the muscles surrounding the knee, improve flexibility, and restore proper biomechanics. This helps prevent re-injury and enhances overall function.
Integrating KT Tape into your rehabilitation program can provide added support during exercises and activities, allowing you to progress safely and effectively towards your goals.
Troubleshooting KT Tape Application
Addressing common issues like poor adhesion, skin irritation, or incorrect placement is vital for optimal KT Tape benefits. Careful attention ensures effective support!
Proper skin preparation and technique adjustments can resolve most problems, maximizing the tape’s therapeutic potential for knee pain relief and stability.
Tape Not Sticking
If your KT Tape isn’t adhering properly, several factors could be at play. Thorough skin preparation is paramount; ensure the area is clean, dry, and free of oils, lotions, or sweat before application. Using alcohol wipes can help degrease the skin effectively.
Additionally, consider the environmental conditions. Humidity and excessive sweating can hinder adhesion. If you anticipate heavy perspiration, lightly powder the skin with talc-free powder before applying the tape.
Proper application technique is also crucial. Ensure firm, even pressure is applied as you smooth the tape onto the skin, activating the adhesive. Rounding the corners of the tape prevents peeling; If the issue persists, try using KT Tape Pro, which offers stronger adhesion, especially for active individuals.
Skin Irritation
Experiencing skin irritation from KT Tape is uncommon, but possible. Mild redness or itching is often temporary and resolves quickly after tape removal. However, if irritation persists or worsens, discontinue use immediately.
Potential causes include adhesive sensitivity or an allergic reaction to the acrylic adhesive. Before widespread application, test a small piece of tape on a less sensitive area of skin for 24 hours.
Ensure proper hygiene and avoid applying tape to broken or irritated skin. If irritation occurs, gently cleanse the area with mild soap and water. Consider hypoallergenic KT Tape options if you have sensitive skin. Consult a healthcare professional if symptoms are severe or don’t subside.
Incorrect Application – Common Mistakes
One frequent error is insufficient skin preparation – hair and oils hinder adhesion. Always shave and clean the area thoroughly. Another mistake is improper tape stretch; too little offers minimal support, while excessive stretch can cause skin irritation or lift the tape edges.
Incorrect anchor points are also common. Ensure anchors are applied without stretch, providing a stable base. Failing to round the tape corners can lead to premature peeling.
Applying tape too tightly restricts circulation. Remember, KT Tape aims to support, not constrict. Practice makes perfect; don’t be discouraged by initial attempts. Review instructional videos and seek guidance if needed.

Resources & Further Learning
Explore KT Tape’s official website for detailed instructions and a wealth of information. Online video tutorials offer visual guidance for proper application techniques.
KT Tape Official Website
Visit www.kttape.com/instructions knee to access the most comprehensive and up-to-date resources on KT taping techniques for the knee. The official KT Tape website serves as a central hub for detailed guides, instructional videos, and frequently asked questions.
You’ll find a wide array of application guides tailored to specific knee conditions, including medial and lateral pain, patellar tracking issues, and support for ligament strains. The website also features articles explaining the science behind KT Tape and how it works to alleviate pain and enhance performance.
Furthermore, explore the product catalog to discover different KT Tape varieties and choose the best option for your needs. Regularly updated content ensures you have access to the latest advancements in KT taping methodologies, empowering you to effectively manage your knee health.
Online Video Tutorials
Enhance your KT taping skills with readily available online video tutorials, often linked from www.kttape.com/instructions knee and other reputable sources. Visual learning is incredibly effective for mastering these techniques, allowing you to observe proper application methods step-by-step.
These videos demonstrate various taping applications for common knee problems, such as runner’s knee, patellar tendonitis, and ligament support. Look for tutorials featuring qualified physical therapists or athletic trainers to ensure accuracy and safety.
Pause, rewind, and replay sections as needed to fully grasp each movement. Supplementing written instructions with video guidance significantly improves your confidence and ability to apply KT Tape correctly, maximizing its therapeutic benefits and minimizing errors.